Painting our kitchen cabinets: the biggest DIY project of my life (thus far).
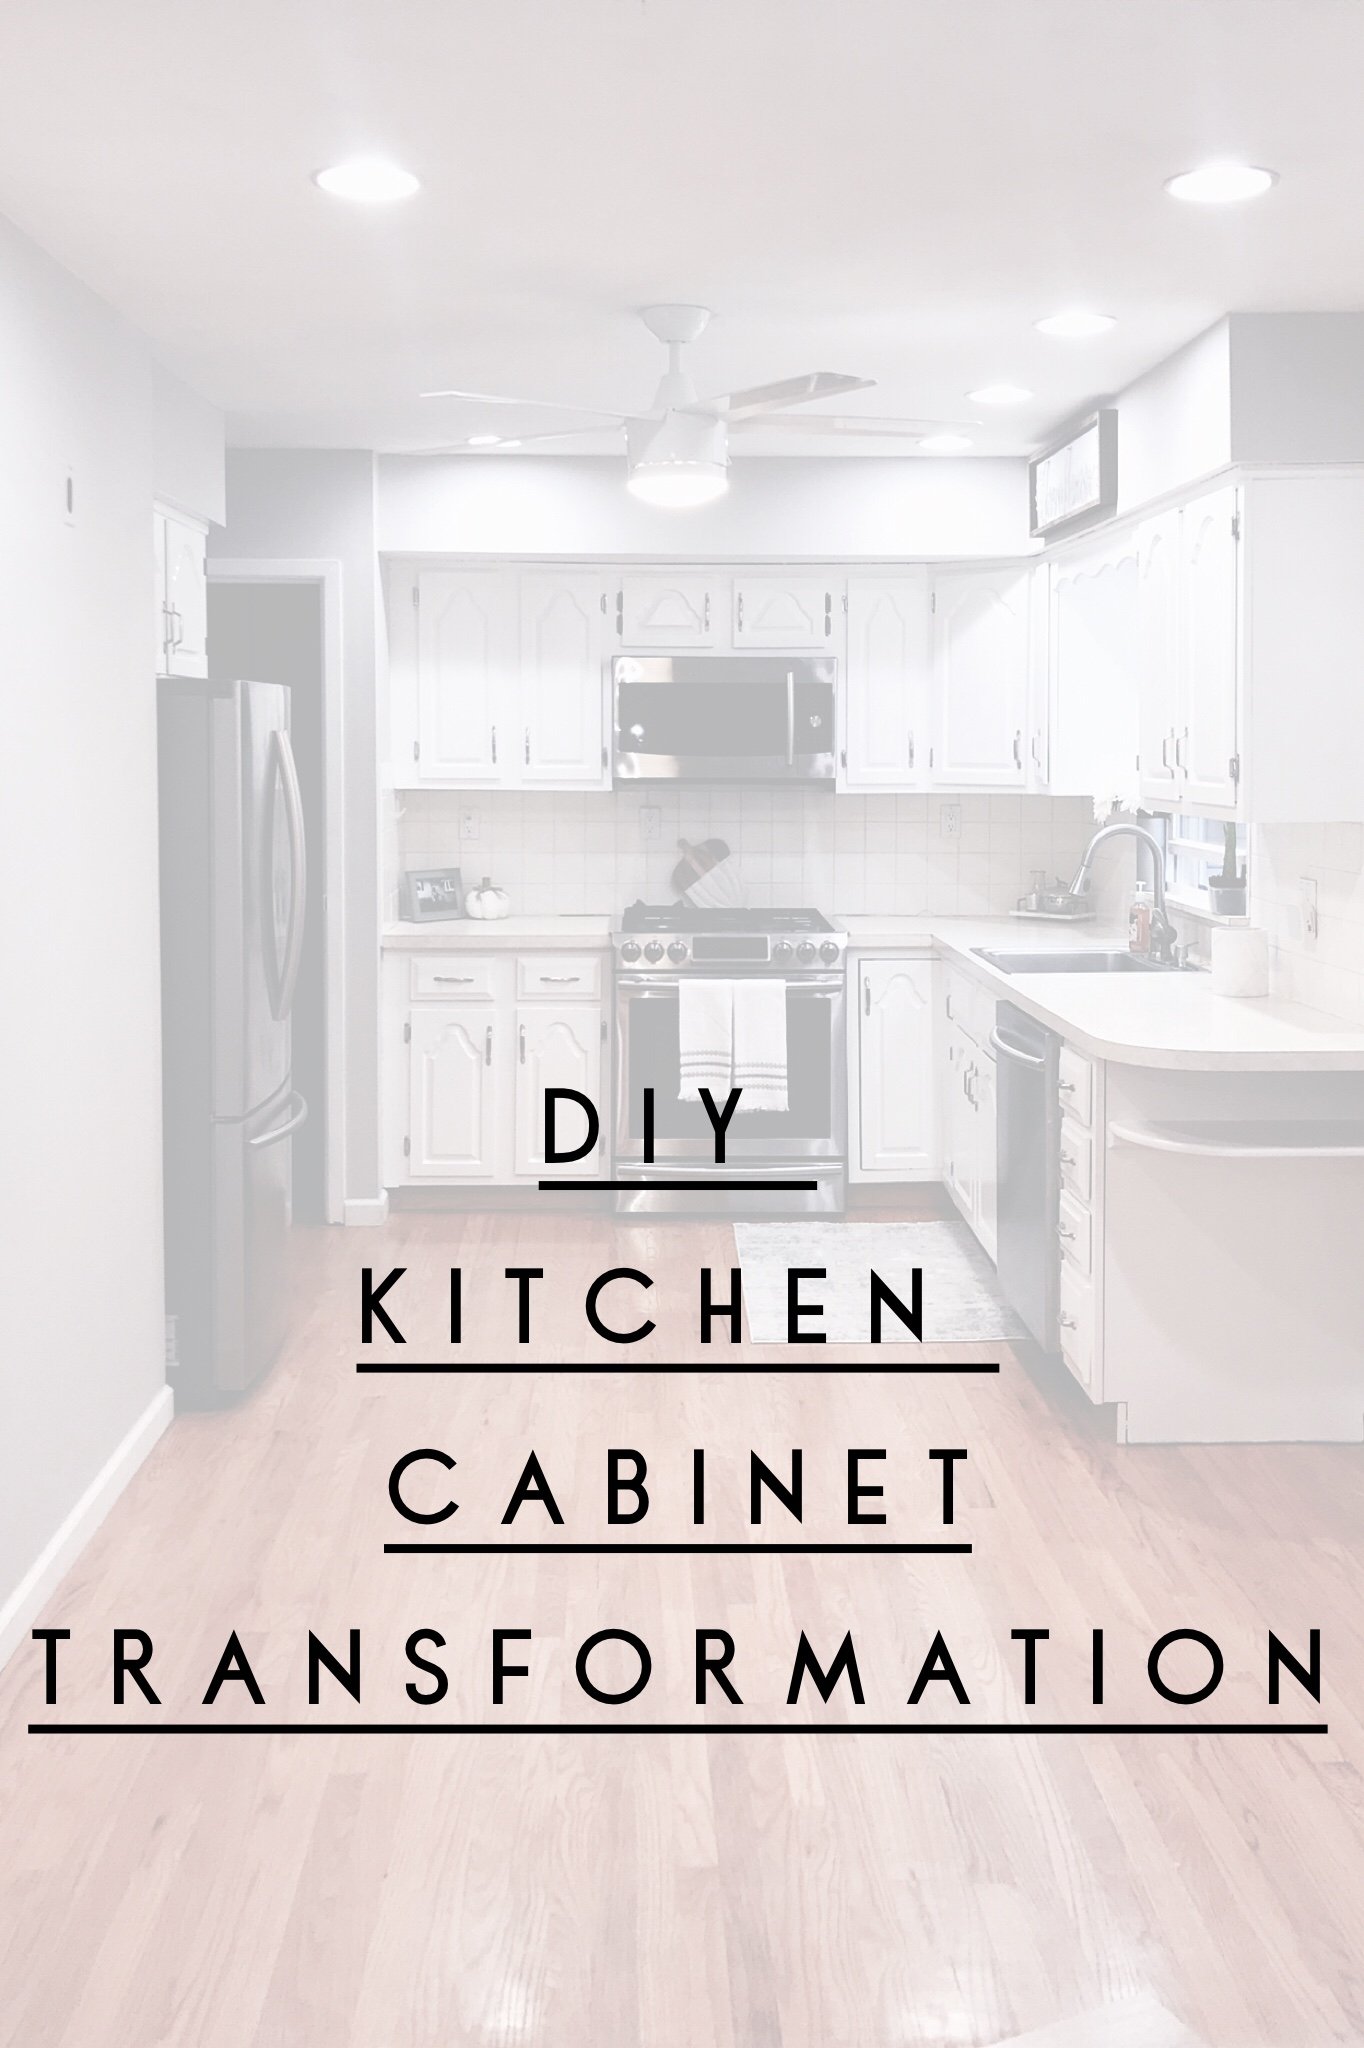
I love DIY-ing. That “after” feeling is amazing and the process of DIY is therapeutic. However, this wasn’t completely therapeutic. At times it was stressful, exhausting and really damn hard. But I would do it over and over again if I knew that my kitchen was going to come out the way it did.
When we closed on our house last June, our realtor asked: “what’s the first thing you’re going to change?”
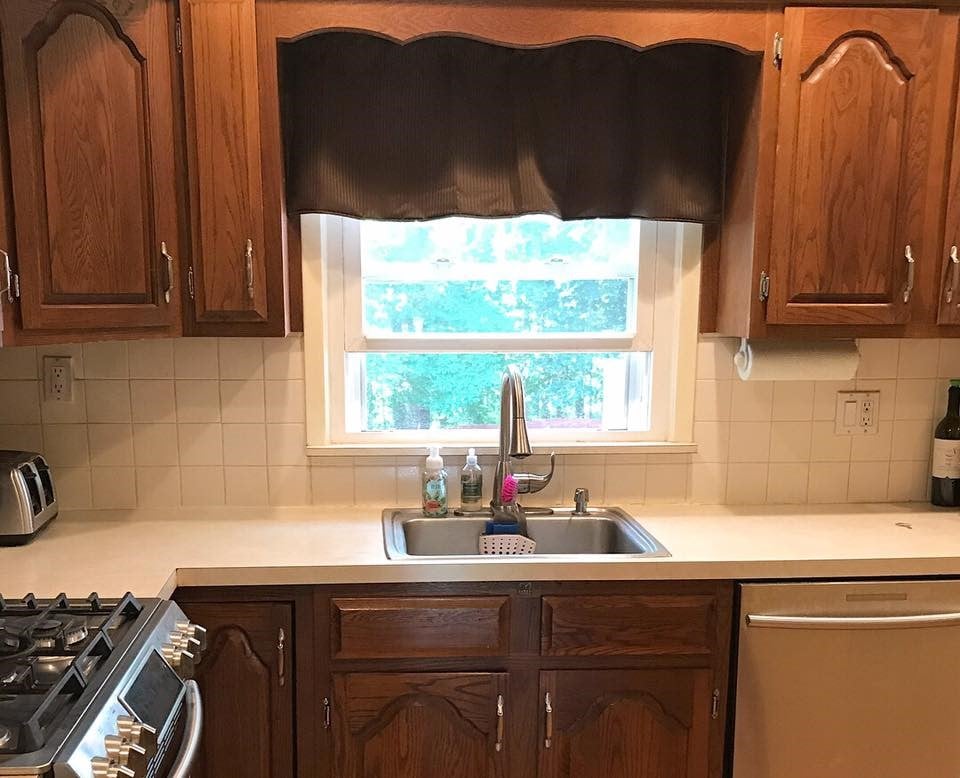
I knew without question that the first thing I would do is paint every single room… and then the cabinets. When we were handed the keys to our house the kitchen walls were yellow and the cabinets were an old oak brown. Who decided this was OK??
Here’s the kitchen the day we closed on the house:

Anyway, after spending a few weeks painting the rooms (I insisted to Angelo that I wanted to paint myself because I actually enjoy it) and the kitchen three times (too dark, too light, just right) I confirmed with myself that I was a skilled and experienced painting professional and could absolutely paint our cabinets. So I began my research, read every blog and watched every Youtube video I could find on painting cabinets yourself. The total time it took from start to finish was 3 weeks (2 full weekends in a row followed by a full 4 day weekend). I should mention that there apparently there are many ways to do this, but I’ll be showing you how I did it and the products I used
PRODUCTS
- TSP (tri-sodium phosphate)
- T-shirt cloth or a lint-free rag
- Empty bucket (no bigger than 1 gal)
- 1 gallon of Zinsser Primer
- 150-200 grit sanding paper
- Wood filler
- Painting mask
- Painters tape
- Drop cloths
- 2 gallons of Benjamin Moore Advance Paint – I wanted the brighest, whitest cabinets so I chose the color Chantilly Lace in a semi-gloss finish. This paint was recommended in almost every tutorial I found on painting cabinets. It’s non-yellowing, seals beautifully and since it acts like a water base it makes it easy to clean with water and soap!
- Cabinet painting kit
- 1” angled paint brush
- At least 4-5 small sponge brushes
- Small containers or ziploc bags
- Power driver
- Rubber gloves
- Thin nails
- Hammer
- Sawhorses (at least 4-6 depending on how many cabinet doors you’ll have to prop up. I used 6)
- Long, thin wood planks
PROCESS
PART I: REMOVE THE DOORS AND SEPARATE HARDWARE
Materials required:
- Power driver
- Small containers/ziploc bags
Using a power driver, remove all the cabinet doors and set aside the handles and hardware. I placed the hardware in separate containers so it would be easier to find each piece when I was done painting. If you’re keeping the handles/hardware, clean each piece with soap and water. I soaked mine in a bucket for a few hours then scrubbed with an old toothbrush. If you’re planning on getting new hardware, you can skip this step
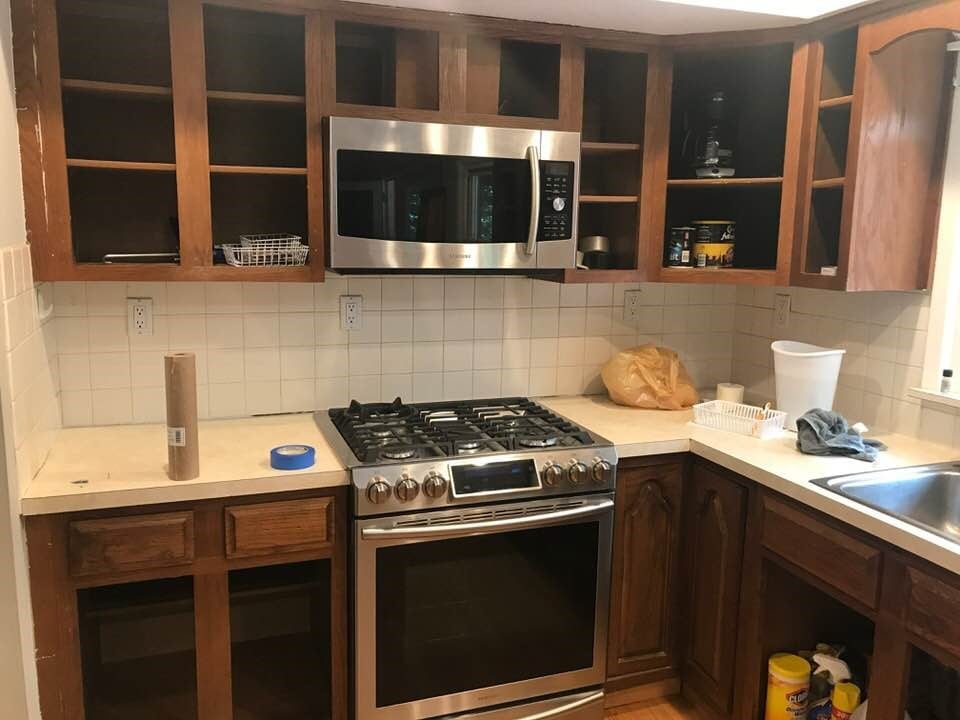
PART II: CLEAN THE SHIT OUT OF YOUR CABINETS
Materials required:
- TSP
- Lint free cloth/old t-shirt
- Bucket
I mixed part TSP and part water in a bucket (**read the label on the TSP bottle**) and old t-shirts to clean every crevice of the cabinets. It’s important to use a lint-free rag or an old t-shirt to ensure you don’t leave lint/residue behind. I recommend doing this in a ventilated area as the TSP chemicals are harsh. You can also use a mixture of dishwashing soap, vinegar and water if you want to avoid the harsh chemicals
PART III: CREATE A WORKING SPACE AND TAPE THE CABINET FIXTURES
Materials required:
- Painters tape
- Drop cloths
- Long wood planks
- Sawhorses
- Thin nails
- Hammer
Once you’re done cleaning the cabinet fixtures, use painters tape around the edges to protect surrounding walls/appliances/etc.
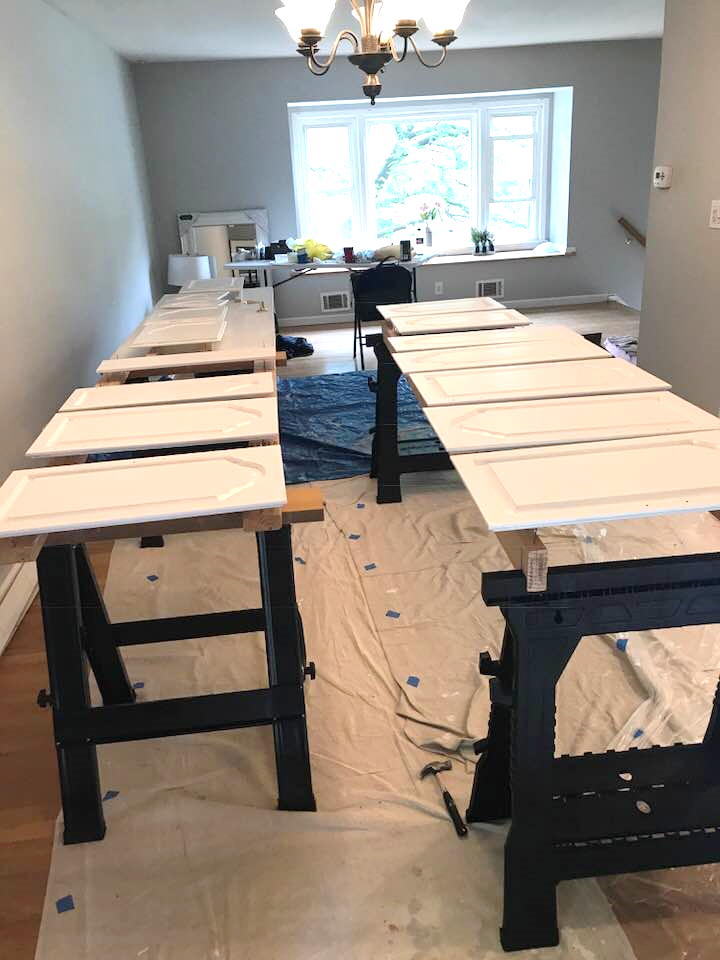
To set up a working station for painting the doors – choose an open area, lay down drop cloths and set up sawhorses. Place two rows of long wood planks across the sawhorses and hammer thin nails into the wood about 6 inches away from each other and all about equal height. Once the nails are hammered into the wood, gently place the cabinet doors on top of the nails leaving about 4-6 inches of space between each door
I actually didn’t place the nailed planks on sawhorses at first because we didn’t have any yet (my lower back definitely paid for it – I was bent over for three days straight). This was a dumb move on my end, and I highly recommend setting the doors on a high surface so you don’t break your back 🙂
Here’s what my setup looked like before sawhorses:

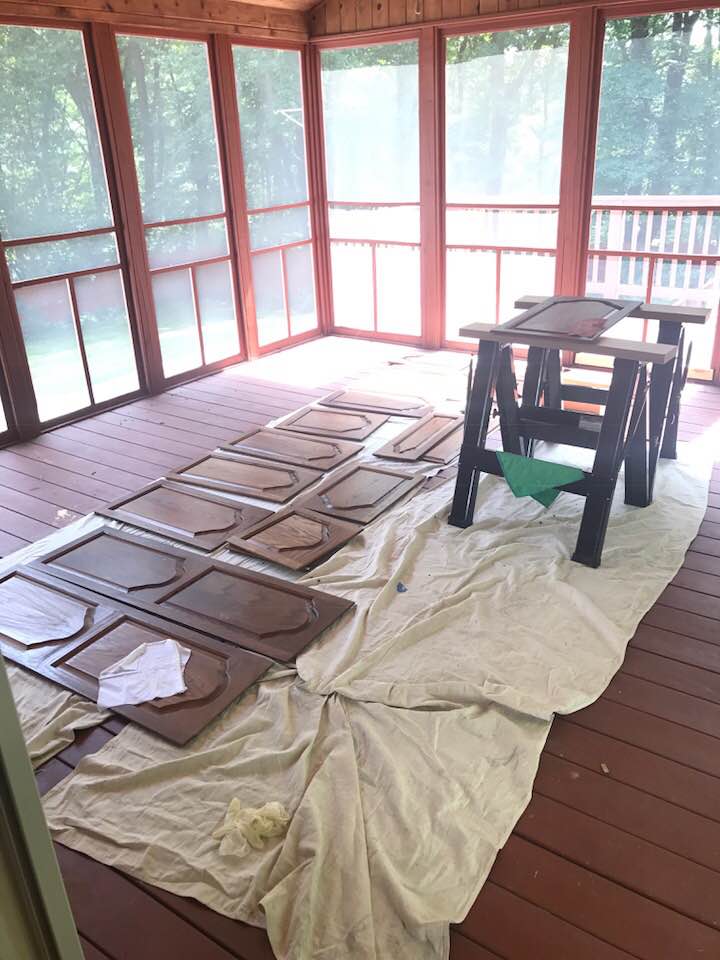
And here’s what it looked like after (unfortunately I had already primed with 2 coats and painted one coat before I had the luxury of the sawhorses):
PART IV: SAND THE CABINETS
Materials required:
- 150-200 grit hand sander
- Lint-free rag/old t-shirt
I was torn between sanding and deglossing. I decided to sand because I read mixed reviews on deglossers, so I bought a small handheld sander and 200 grit sandpaper. I wouldn’t recommend purchasing anything below 150 grit, otherwise you’ll start creating an uneven surface. Before you sand, you should fill in any small holes with wood filler. I didn’t do this, but I should have (oops). I spent probably 3 minutes sanding each cabinet door (front and back) to ensure there was absolutely no finish or shine left. The cabinets should look dull after this step.
Once you’re done sanding, wipe off excess residue with an old t-shirt or lint-free cloth
PART V: PRIME
Materials required:
- Paint roller
- Zinsser primer
- Small foam brush
- Rubber gloves
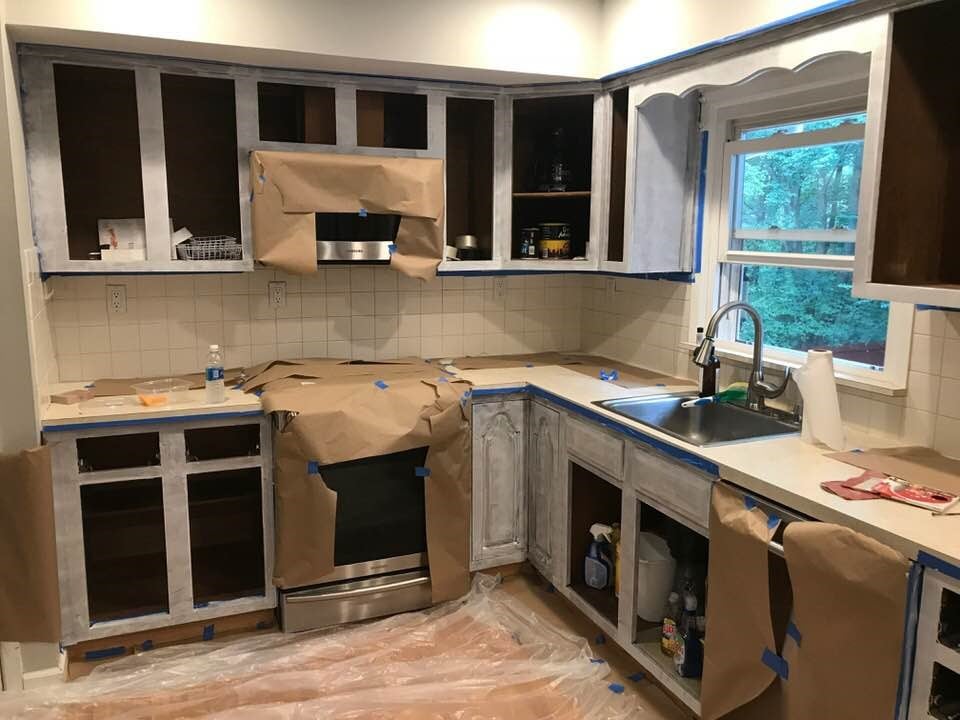
Put on gloves, grab the Zinsser primer, a paint roller, a small foam brush (I used a foam brush and noticed this made the angled areas look smoother versus using a brush which created stroke lines) or small angled brush for the crevices and start priming! I painted the backs of the doors first, then painted the cabinet fixtures. Once I was done with the fixtures, I flipped over the doors and painted the front. I repeated the same process with a second coat 24 hours later.
Here’s what the cabinets looked like after the first coat of primer:
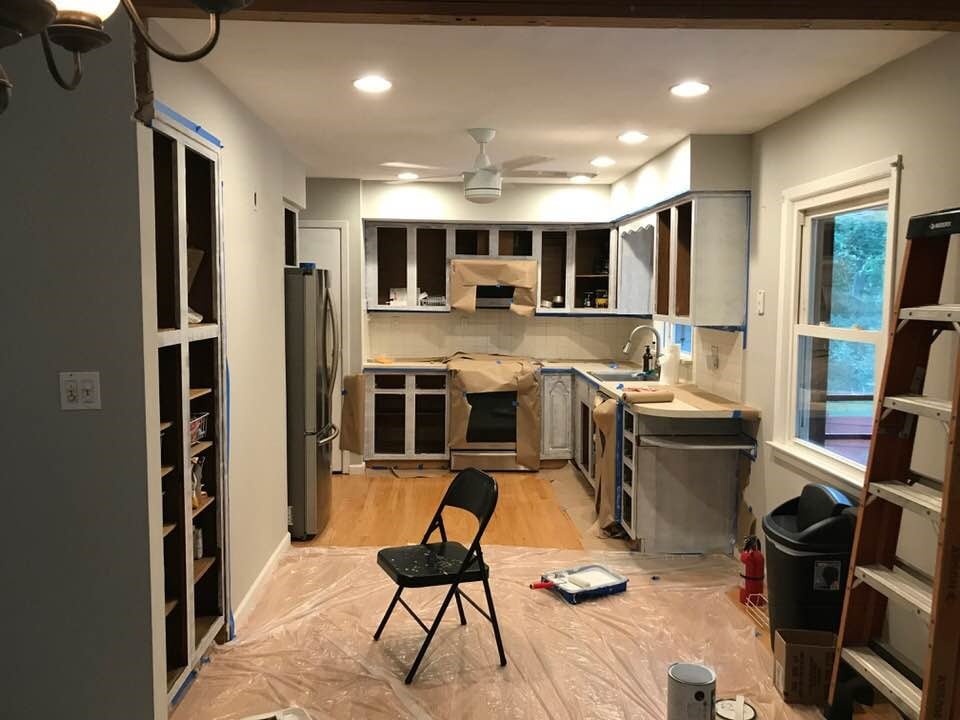
Side note…we knocked down the wall between the kitchen and dining room a few weeks prior. It made the kitchen/dining area feel so much more open!
PART VI: PAINT
Materials required:
- Paint
- Paint roller
- Small angled paintbrush/foam paint brush,
- Painters mask
This step is similar to priming, except it’s the real deal. Using gloves, a paint roller and a small angled brush/foam brush (per above, I used a foam brush to avoid stroke marks), begin painting the backs of the cabinet doors, then the fixtures. Once you’re done painting the fixtures, flip over the doors and paint the front of the doors. Wait 24 hours between coats.
I painted 3 coats of paint on the cabinets. In addition to the primer coats, that’s 5 coats total…and many hours of painting/stress eating.
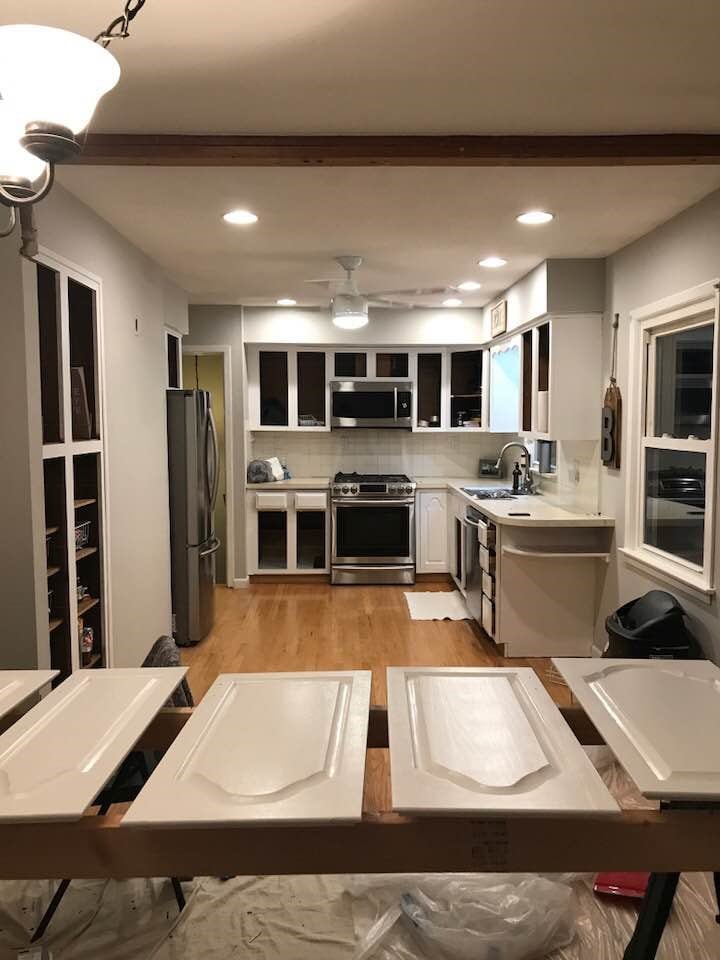
Look at the shine on those doors!
THE FINAL CHAPTER: Wait
This step actually requires the most amount of patience and is the most mentally torturous because all you’ll want to do is hang the doors up and gasp/cry/scream at the dramatic transformation. But let me be very clear – you must wait at least 1.5 weeks (the term is called “curing”) before putting the doors and hardware back on, or else you’ll compromise everything. I waited 8 days and wish I waited longer. At the time I painted my cabinets it was 1000% humidity outside therefore making the cabinets take a lot longer to dry. If you live in a dryer, cooler area then you could probably get away with 1 week but trust me, the longer you wait the better. I have -O patience and I can honestly say this was worth the wait. I noticed my cabinets didn’t fully “cure” until about two months later.
So, after waiting for what felt like years, here is the final product:


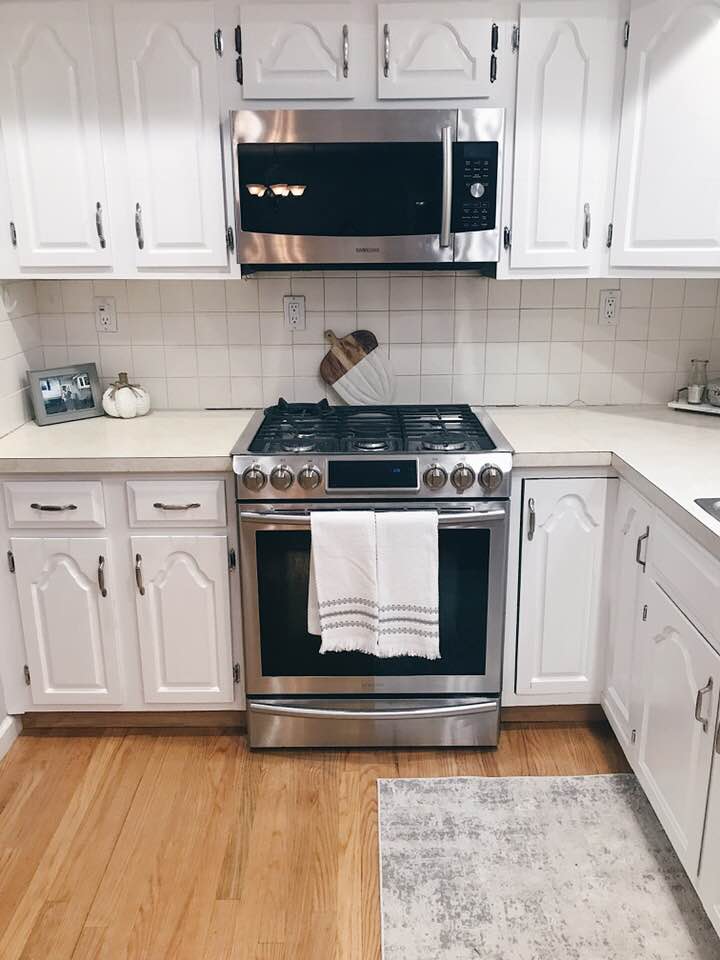
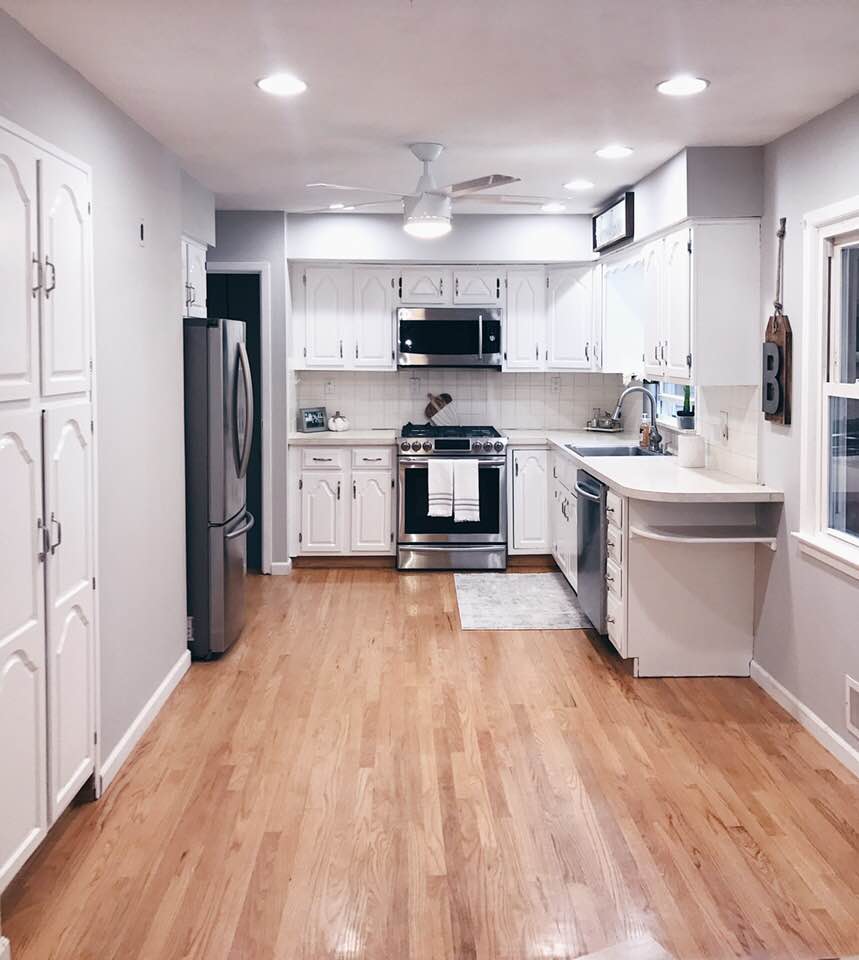
Side by side comparison:



OMG. It looks gorgeous. I don.t have the patience. And if something goes wrong i usually give up everything. You are amazing for doing that. Great job!
Hi Krissa!
You are so sweet – thank you for the compliment! We sound similar – I actually do NOT have the patience either and typically would give up everything if *one* thing went wrong but this was so worth it! If I can do it, anyone can do it 🙂
Beautiful! But I also would LOVE to know what colour you painted your kitchen walls! It’s the colour I want to do on mine…
Hi Louise!
Thanks for your comment 🙂 The color on the walls in my kitchen is “Repose Gray” by Sherwin Williams. It’s a true gray and doesn’t look too cool or too warm. Good luck with painting!
– Alisa
Hello blogger, i must say you have very interesting posts here.
Your website can go viral. You need initial traffic
boost only. How to get it? Search for; make your content go viral Wrastain’s tools
I have checked your page and i’ve found some
duplicate content, that’s why you don’t rank high in google’s search results,
but there is a tool that can help you to create 100% unique content, search
for; Boorfe’s tips unlimited content
I’m a Realtor in the Raleigh/Cary area of North Carolina and have had clients who have done this…..its an enormous job and takes forever to do so bravo to you, your kitchen looks amazing. Truly a lot of work ,but well worth it!
Thank you Sharon! Our realtor also told us it would be so much work but I’m so glad I did it. ????
I have checked your site and i have found some duplicate content, that’s why you don’t rank high in google’s search results, but
there is a tool that can help you to create 100% unique content,
search for: Best article rewritwer Ercannou’s essential tools
Propecia Prostate [url=http://crdrugs.com]cialis overnight shipping from usa[/url] Allopurinol 300 Mg Australia Zithromax Class Of Antibiotic
AglassofBovino~ I just found your blog–two years later! It was actually in my email and I was so loving your lucite curtain rods, then I saw your kitchen transformation, which is exactly what I want to do to mine–but never having painted kitchen cabinets before, I am very stressed about it. I’ve looked at a gazillion YouTube videos, blogs, etc and yours stands out because I think you’re keeping it real as you go.
It looks beautiful–everything does; the bedroom, dining room, living area, downstairs, your office. I can’t wait to get started on mine. Thank you so very much for the inspiration–two years later! 😉
Wow thank you so much for the kind words! I appreciate it!! 🙂