After making an impulsive decision to start A Glass of Bovino in Dec. 2017, I registered this domain, created a WordPress account and then immediately drove to Best Buy to purchase a Canon Rebel T6, because I *desperately* wanted to start taking better photos of our new home.
Having zero idea how to use the camera, I’d point at something and click away, hoping for the best. I soon became obsessed with capturing every little thing that I thought looked pretty (which, at the time, wasn’t more than a few cheap looking faux peonies). Bless the kind hearted souls who told me to “stick with it sweetie!“
The Canon T6 and my iPhone were both great to practice with, but as time went on, I had an itch to uplevel my photography skills. I did some research and realized that a full frame camera is best for shooting interiors as they allow more light into the photo. And since our house gets as much natural light as a Romanian bat cave, it was a no-brainer to upgrade.
I upgraded to a Canon 6D body and purchased a Tamron 24-70 mm f 2.8 lens last October. It took a while to figure out how to adjust the settings to capture the best photos of our home, but the investment paid off and the quality of my photography has significantly improved ever since.
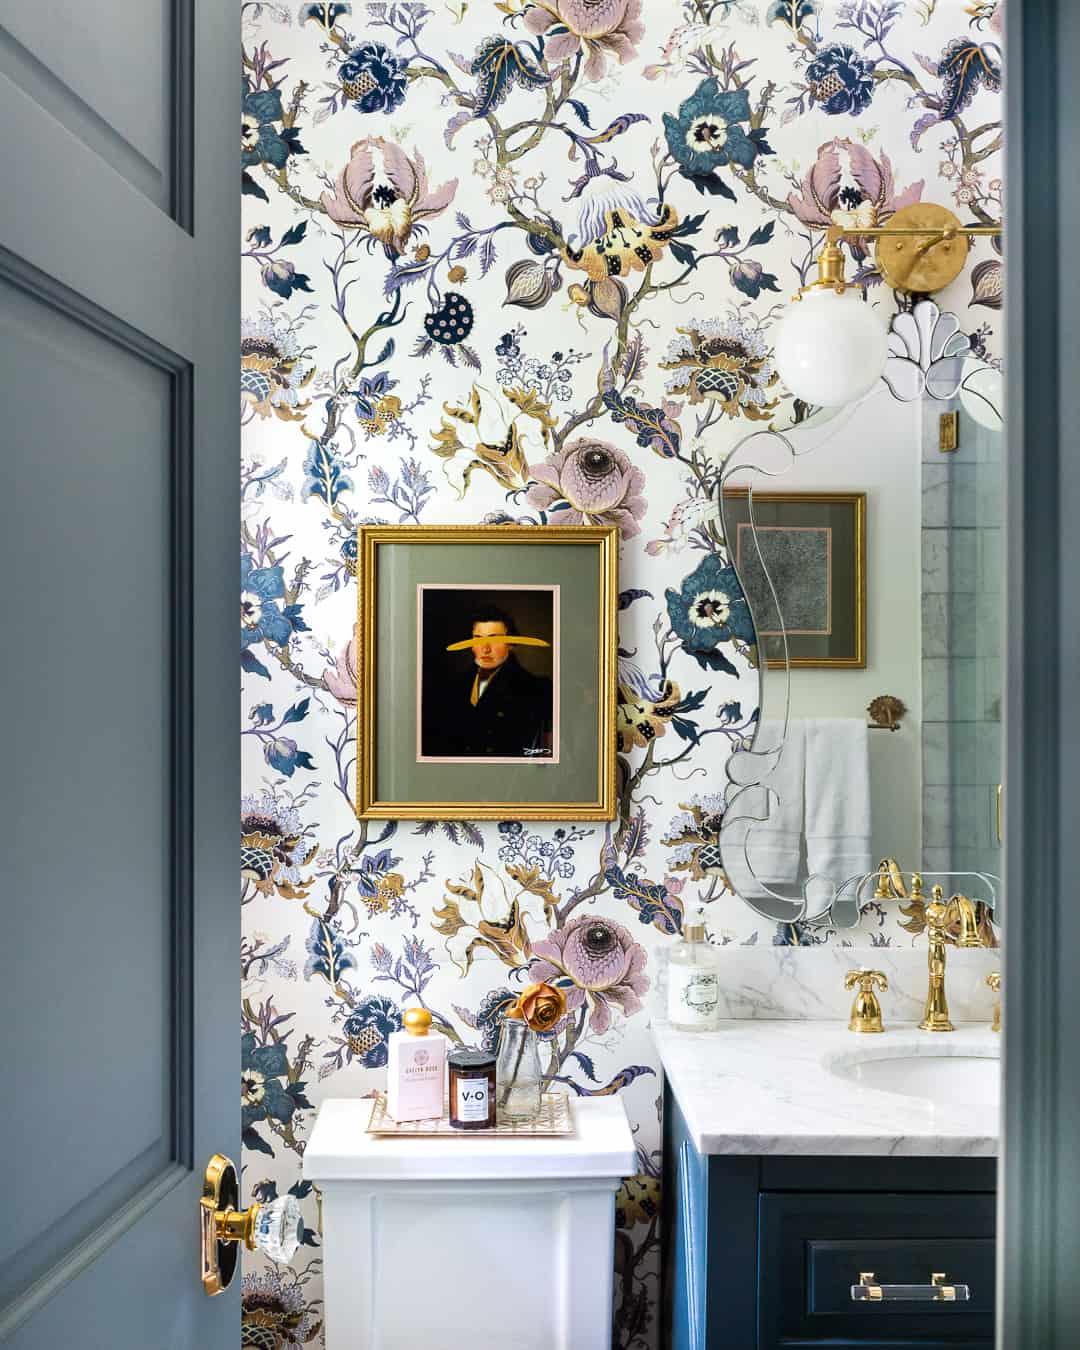
I’m not a professional, but as I’ve continued to practice, learn how to use my camera and understand photography, I want to share some game-changing tips and tricks that have helped me so you can start taking better photos with your iPhone or camera (and yes, you can take stunning photos with your iPhone).
Most of these tips will apply to interior photography, but could definitely be applied to anything you want to take photos of.
#1: Use a tripod
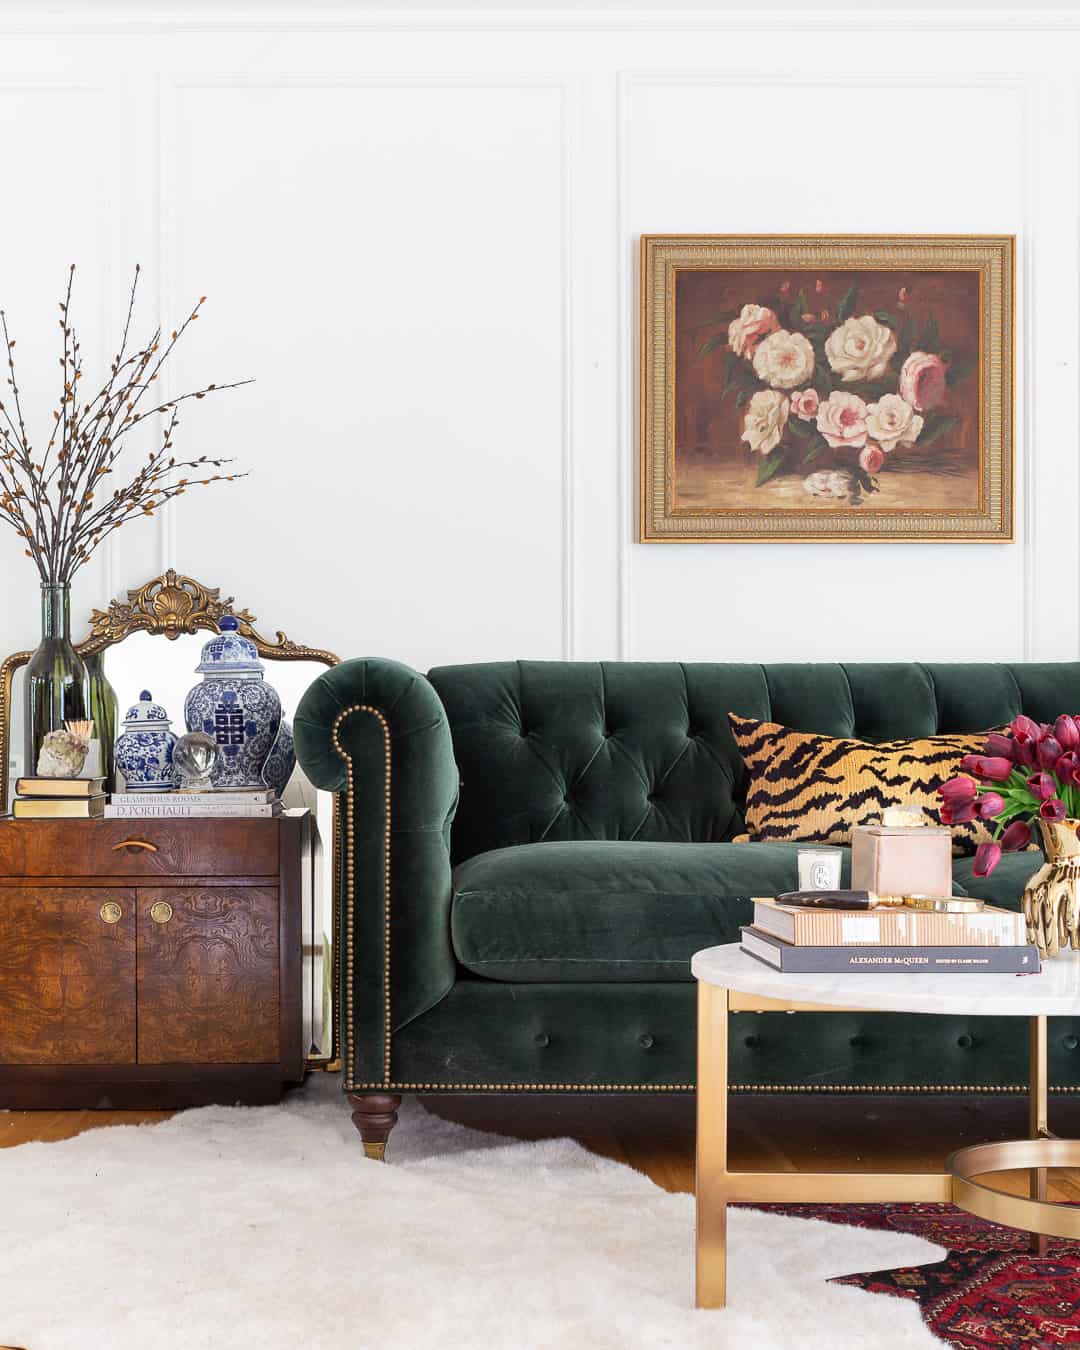
You may think you’re holding your hand steady, but using a tripod makes a massive difference in the quality and sharpness of your photos. Sometimes I take a few spur-of-the-moment lazy shots without a tripod but I almost always regret it when I upload to Lightroom and notice that they’re blurry. And then I have to do it all over again, with the tripod.
With tripod:
Without tripod:
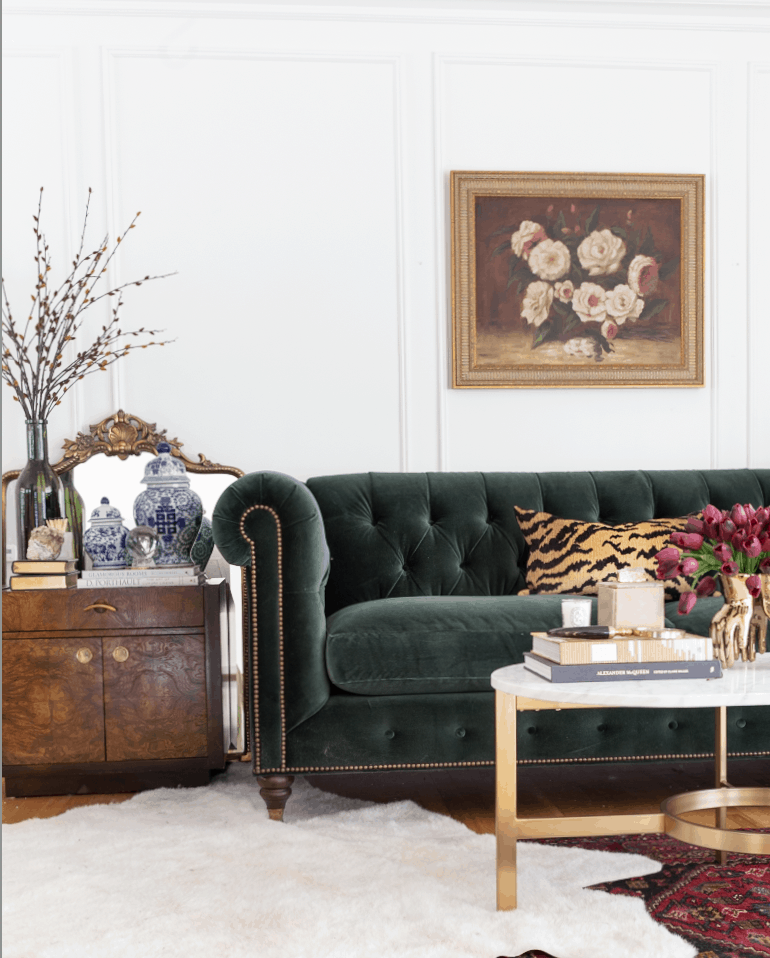
You know that saying that’s like “do it right the first time or throw yourself into a fit of rage cause you have to do it again” or something like that? That’s what it’s like whenever I’m lazy about using a tripod.
PS – the tripods I use/recommend are at the end of this post.
#2 Exposure, exposure, exposure
Exposure is the brightness of an image, and using the right exposure is especially important if you plan to take photos inside.
There’s a trick that I didn’t learn until recently about how to adjust your camera’s exposure on your iPhone.
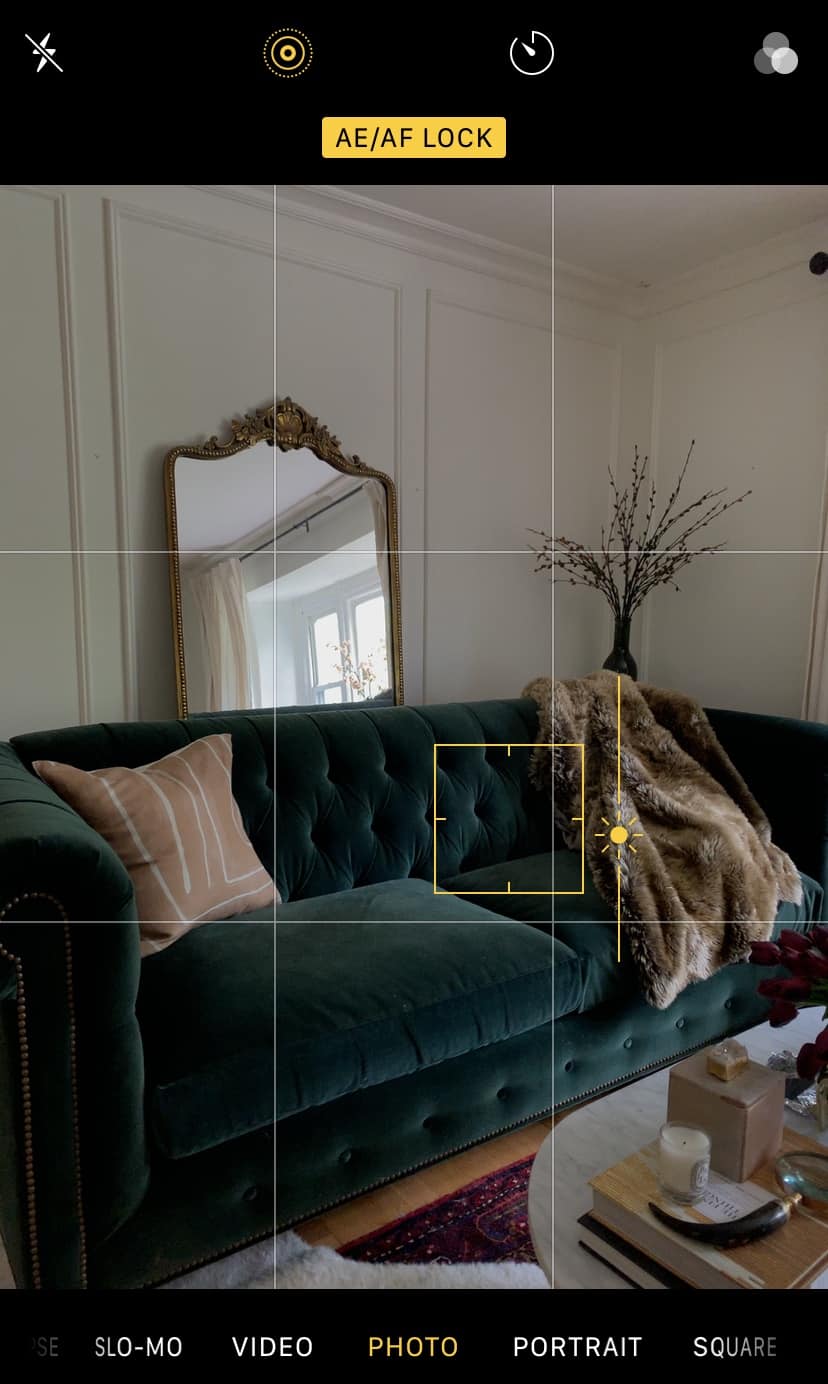
When you open your camera app, place your finger on the darker part of the image and slide the exposure up and down until it’s just right.
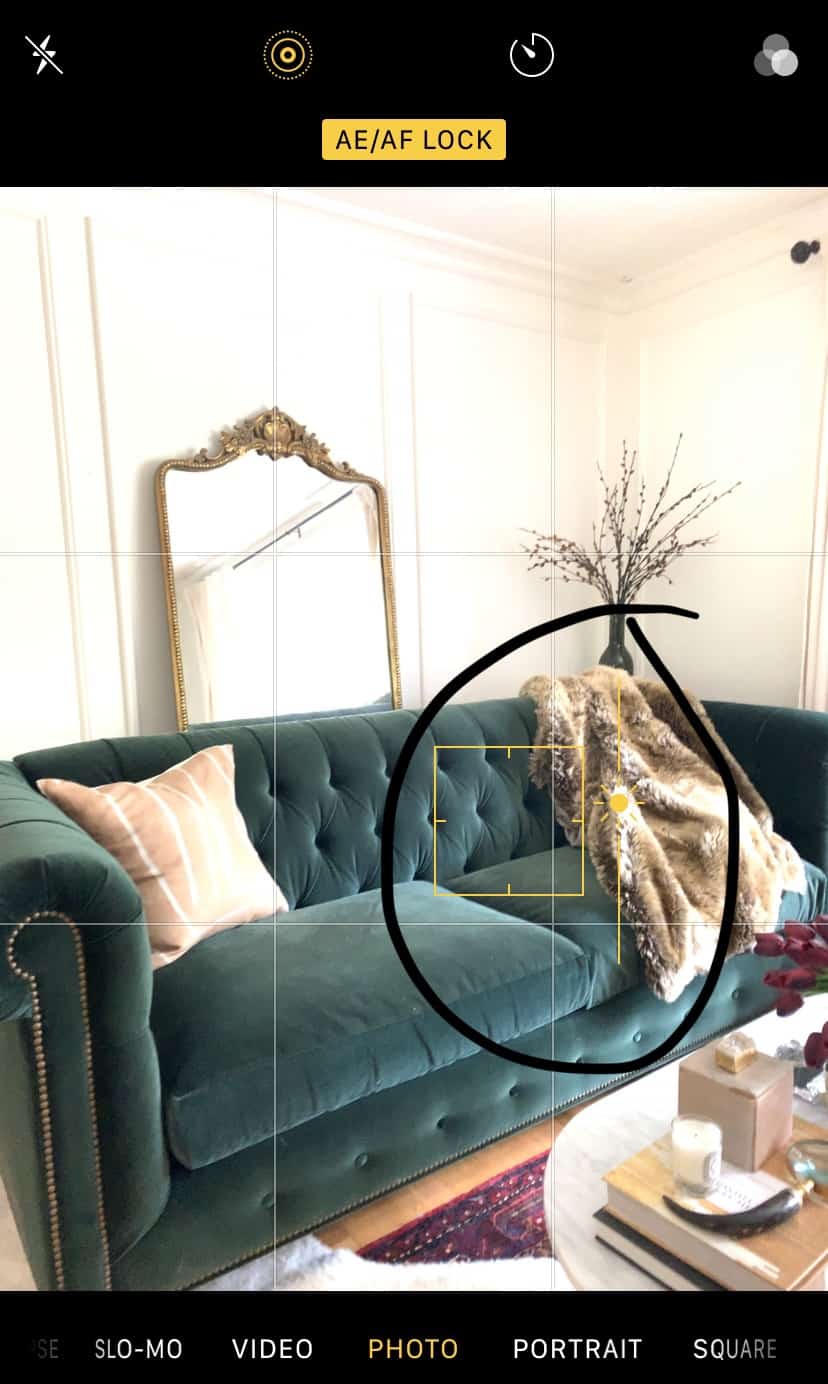
Exposure is too high
Too low
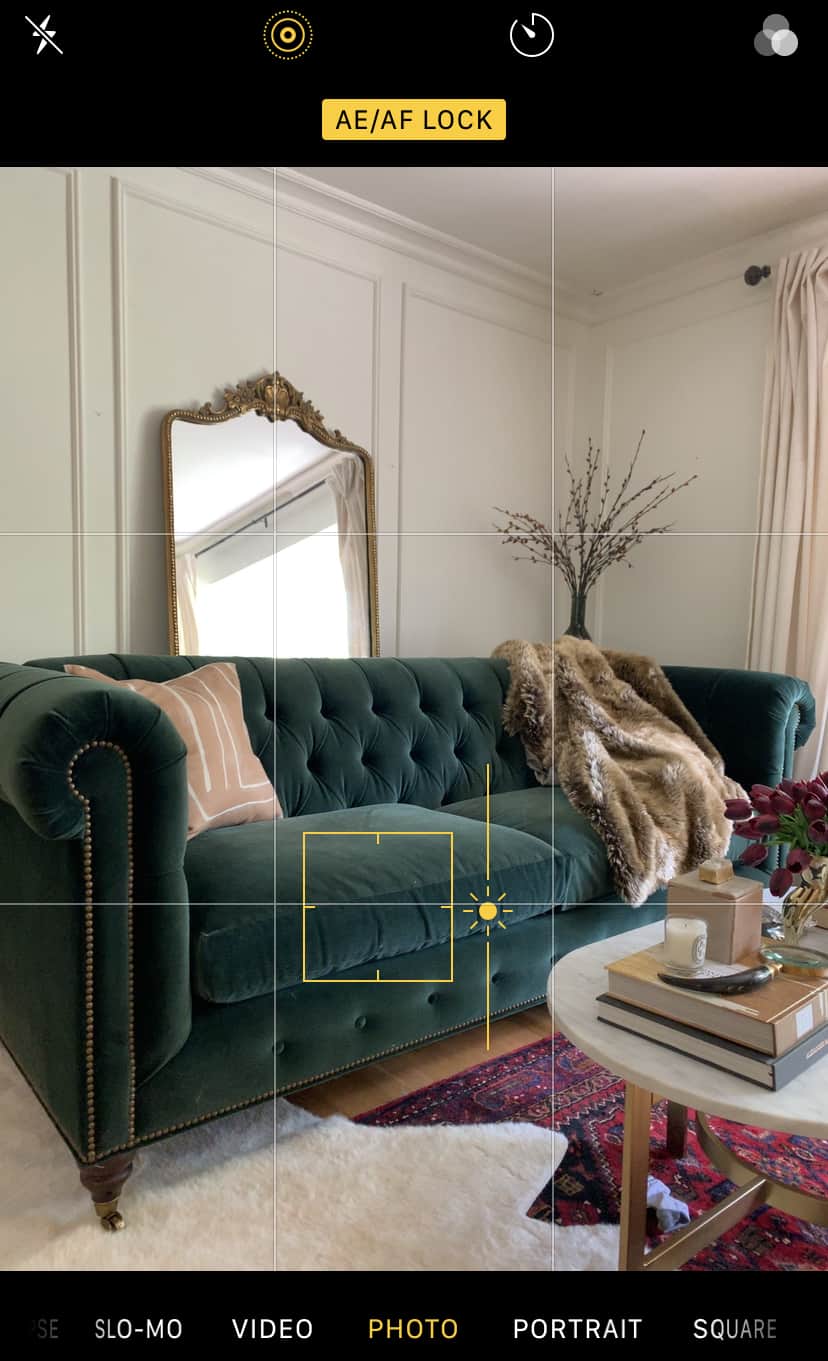
Just about right
I slid the yellow bar up and down until the photo wasn’t too under or over exposed. Your goal is to capture as much detail as possible.
The same applies when using a camera. Adjust your camera’s exposure settings (ISO, Aperture and Shutter) and take a few photos until you’re pleased with the result.
Adjusting your camera’s settings to take interior photos requires another separate blog post, but in the meantime, this article helped me understand how to adjust my settings and contains straightforward info on photography terminology.
If your photos turn out too bright or too dark, you could always edit them, but the final result will be better when your exposure is properly adjusted while taking photos.
#3 Composition & shooting straight
Positioning your camera is important for good composition, and shooting straight is key.
This tip reminds me of the way I used to take photos, which was crooked and all over the place. I would hold the phone up to my chin and shoot straight down like my dear mother using her flashlight to read a menu in a dark restaurant.
Sharing this photo that I took last year is more painful than ripping a hot waxing strip off, but it’s necessary to show you what not to do (I suppose we all started somewhere):
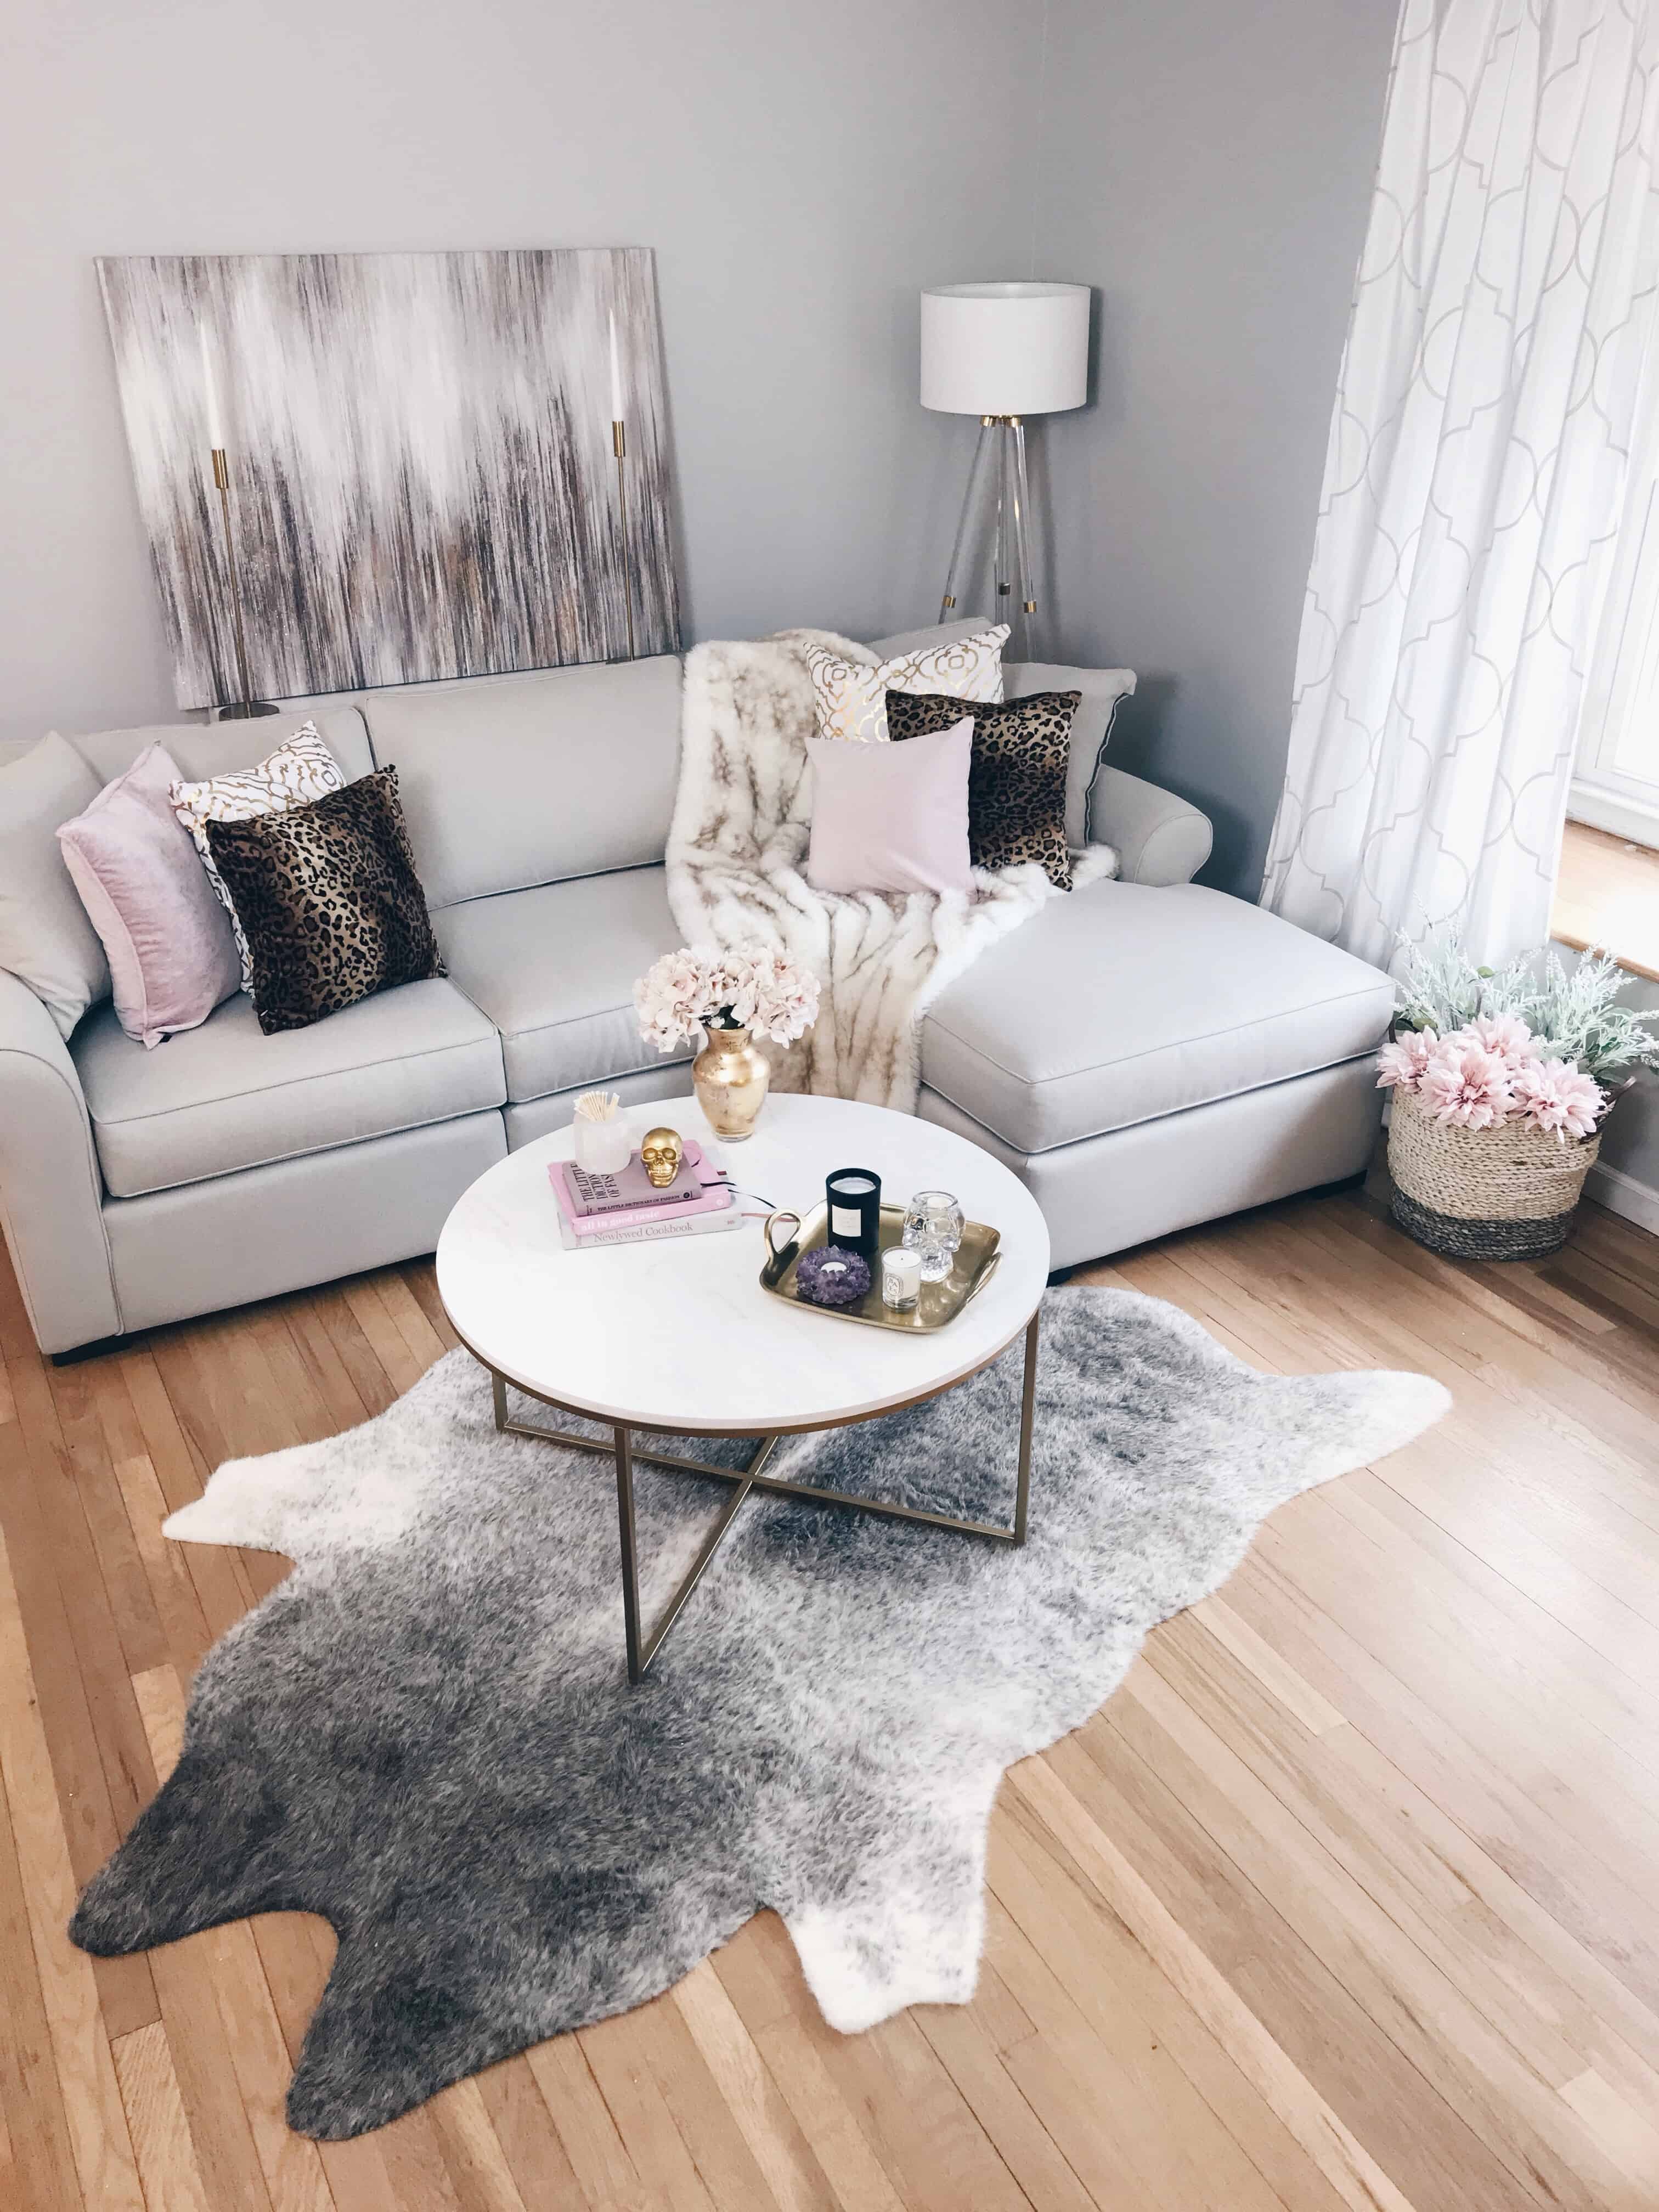
When you tilt the camera up or down (or in my case, slightly to the side??), you’re distorting the photo and it looks a bit….sloppy. The rule of thumb is to shoot at the same level of your subject.
For example, if I’m taking a photo of our nightstand, I adjust the tripod to be level with the nightstand vs. shooting from above. The tripod also ensures that I’m shooting straight.
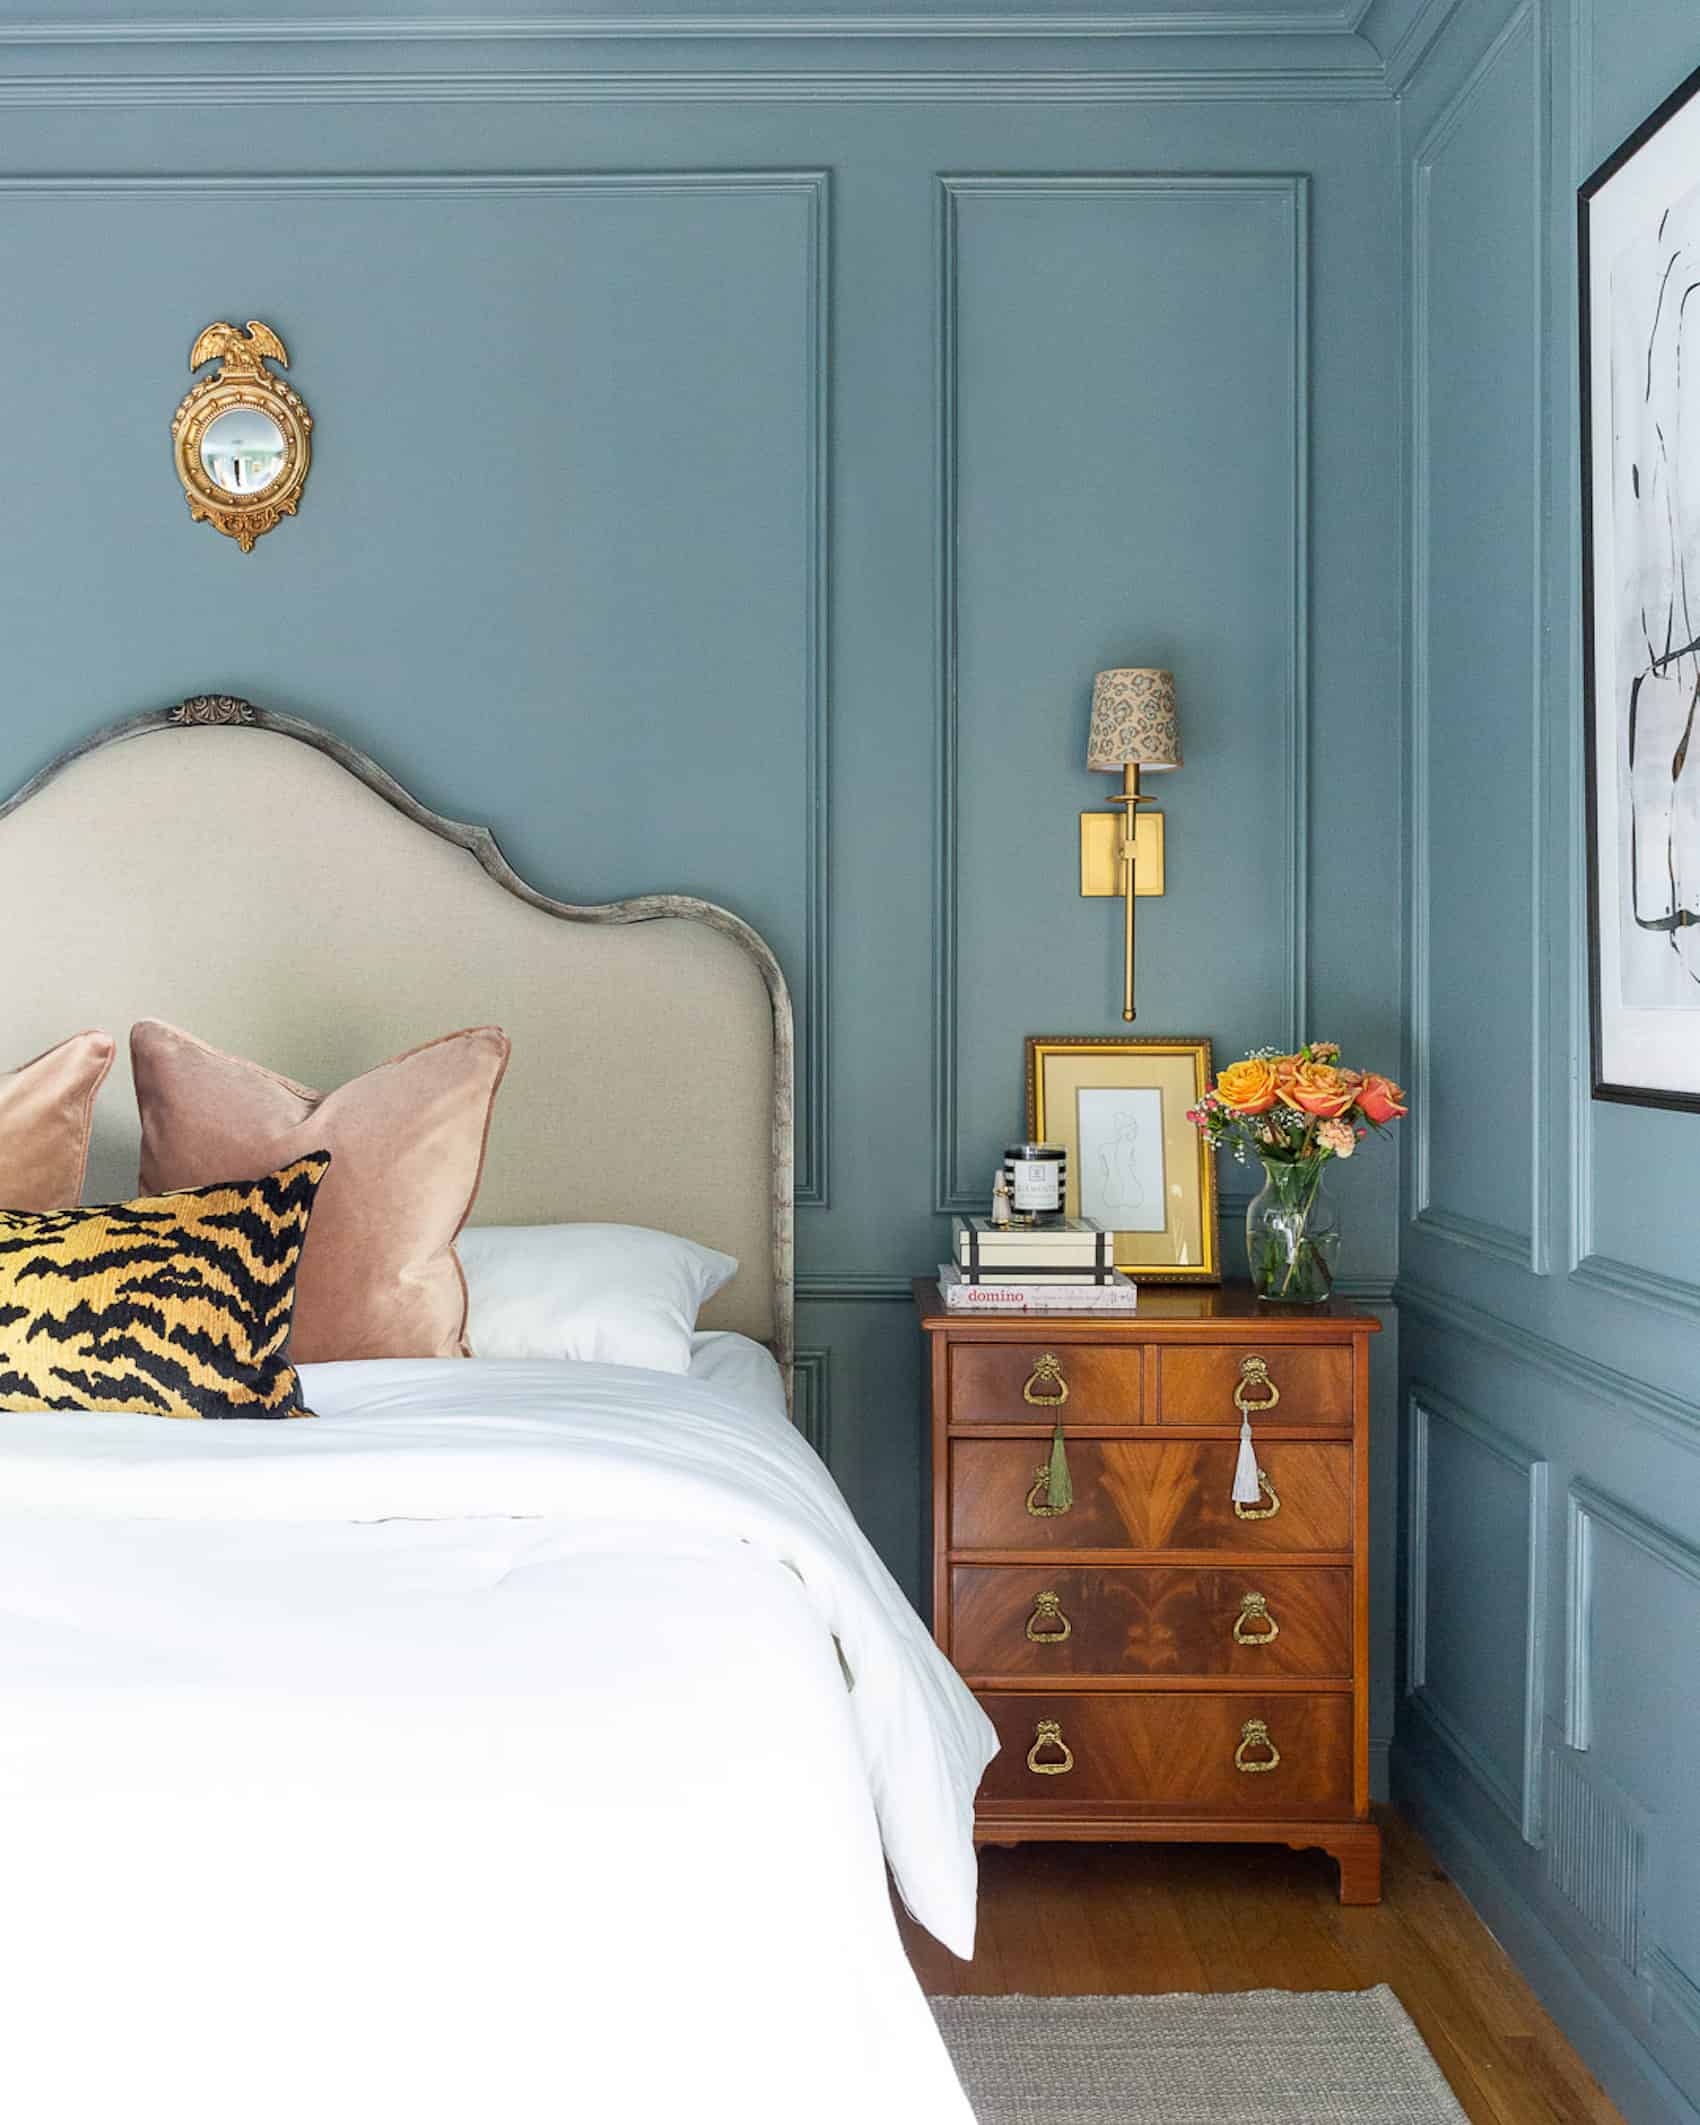
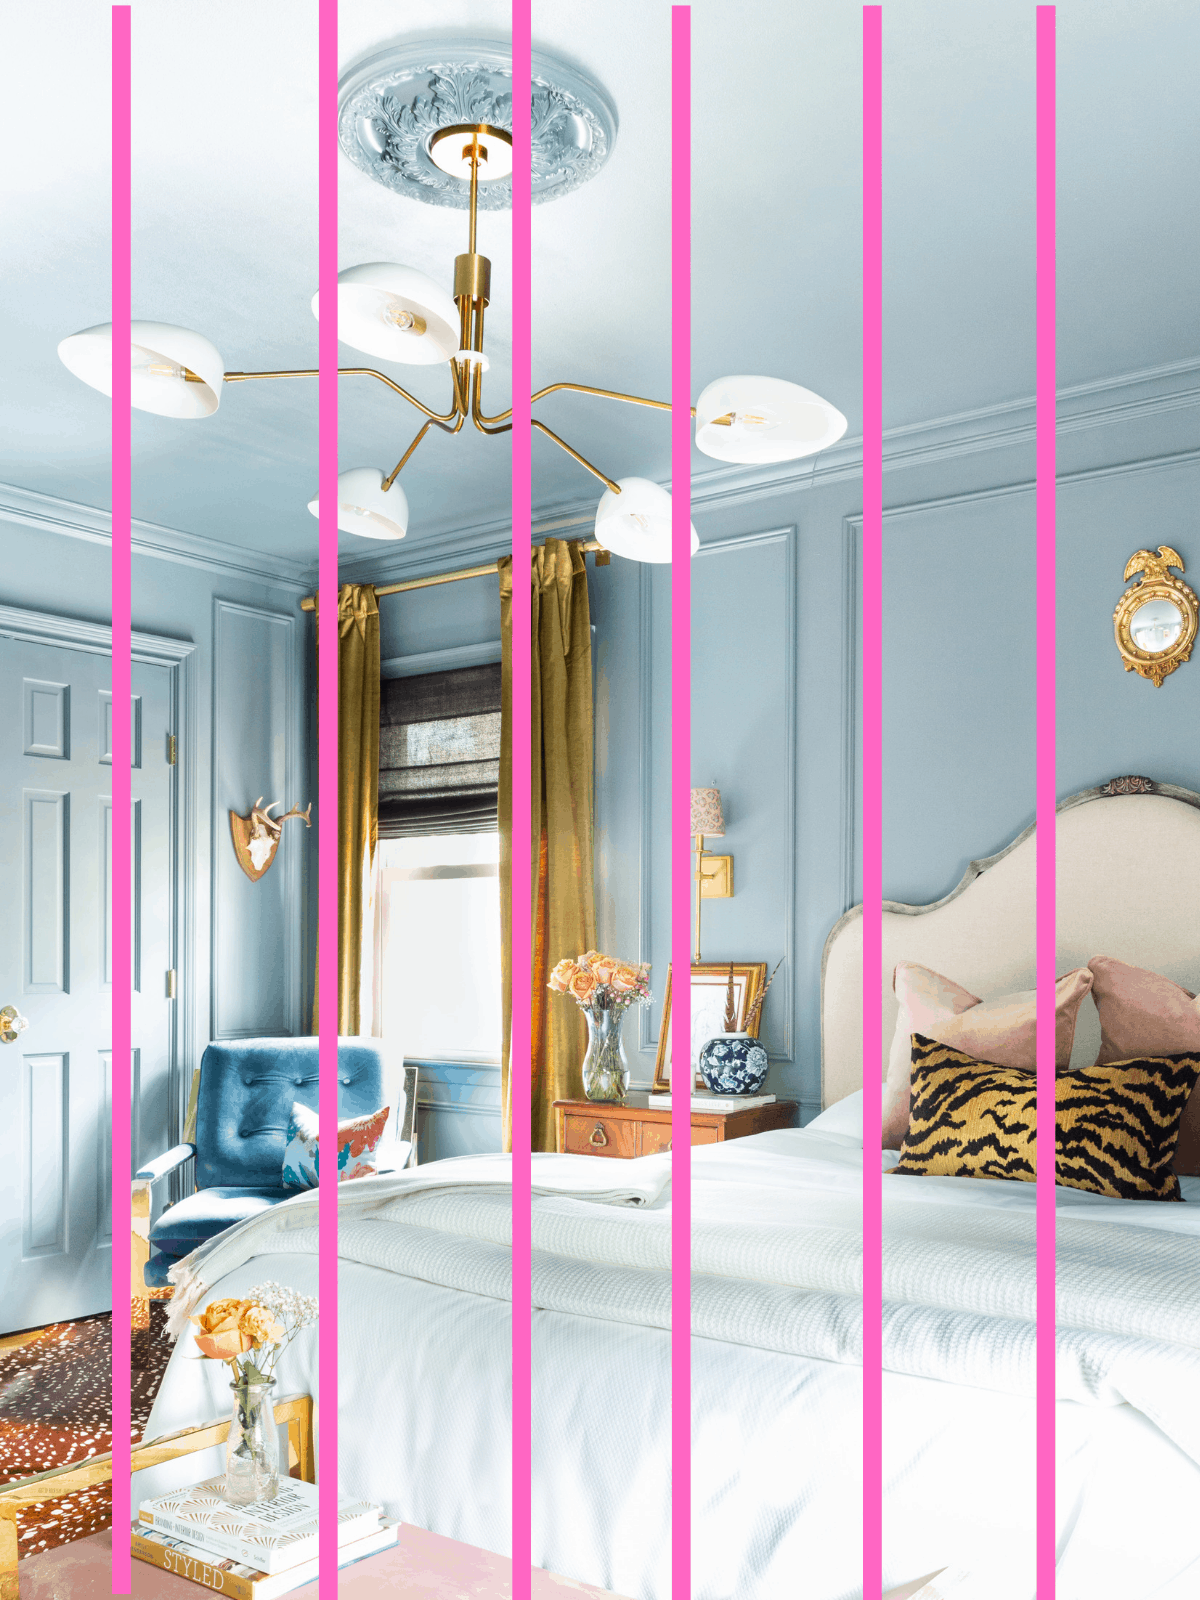
Even when shooting towards a corner (which is common in small rooms), you should focus on vertical lines. Another reason why a tripod is so important because you can line up your frame before shooting. I added vertical lines to the below photo to show you what I mean by shooting straight:
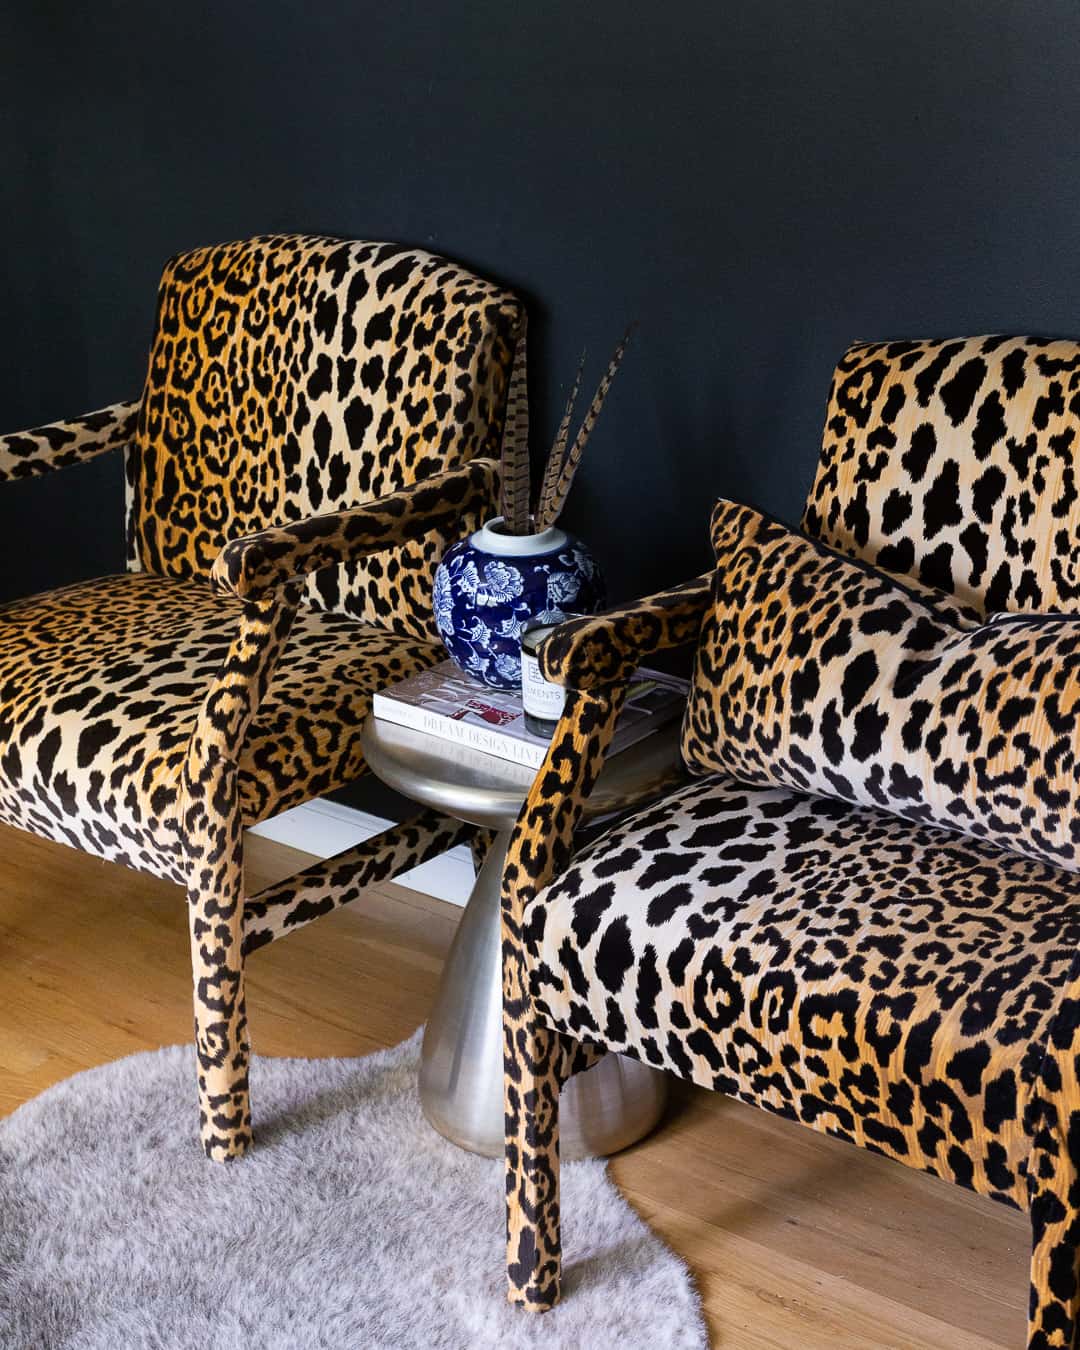
I try to shoot straight most of the time now, but once in a while I like to live on the edge and try out different angles and heights (still with my tripod), like this:
iPhone tip: For vertical lines to appear when shooting go to Settings –> Camera –> and make sure Grid is selected. You can also do this on a camera depending on the make/model you have.
#4 Edit
Don’t skip photo editing.
You’d be missing out on making a good photo even better by spending a few minutes retouching. I use Lightroom Classic on my desktop and love it (I pay only $9.99/mo for both Lightroom AND Photoshop), but any basic photo editing app like VSCO, Afterlight and Snapseed can get the job done.
I usually adjust the brightness, contrast, tint, and temperature. If the photo looks too blue, I’ll raise the temperature so it’s warmer. If the photo looks too pink, I’ll lower the tint to balance it with green. These are the adjustments I made to a photo that looked wayyy too green thanks to the rainforest we have in our backyard:
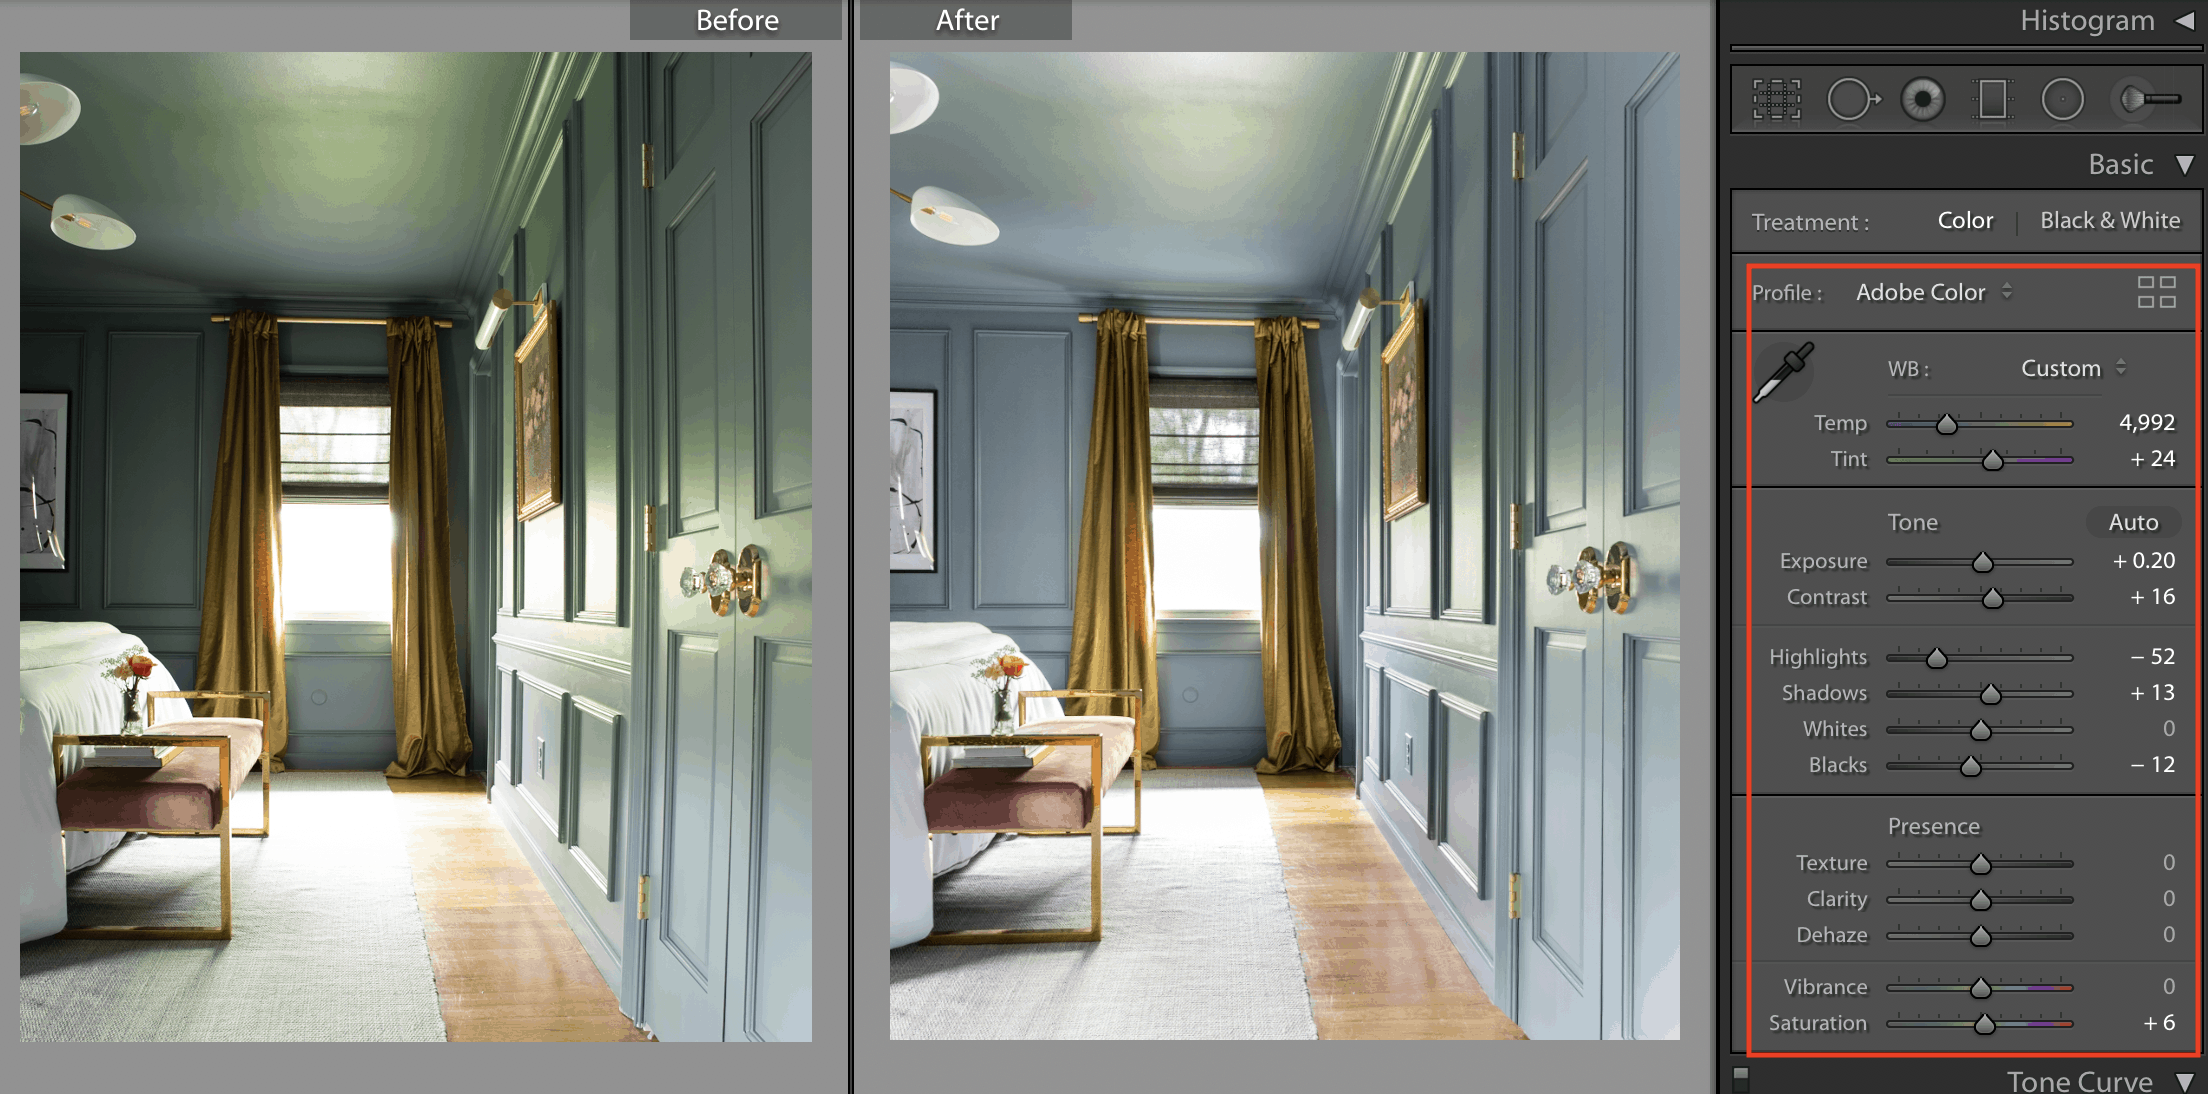
I recently learned a trick that *drastically* made my photos look more professional when editing in Lightroom…
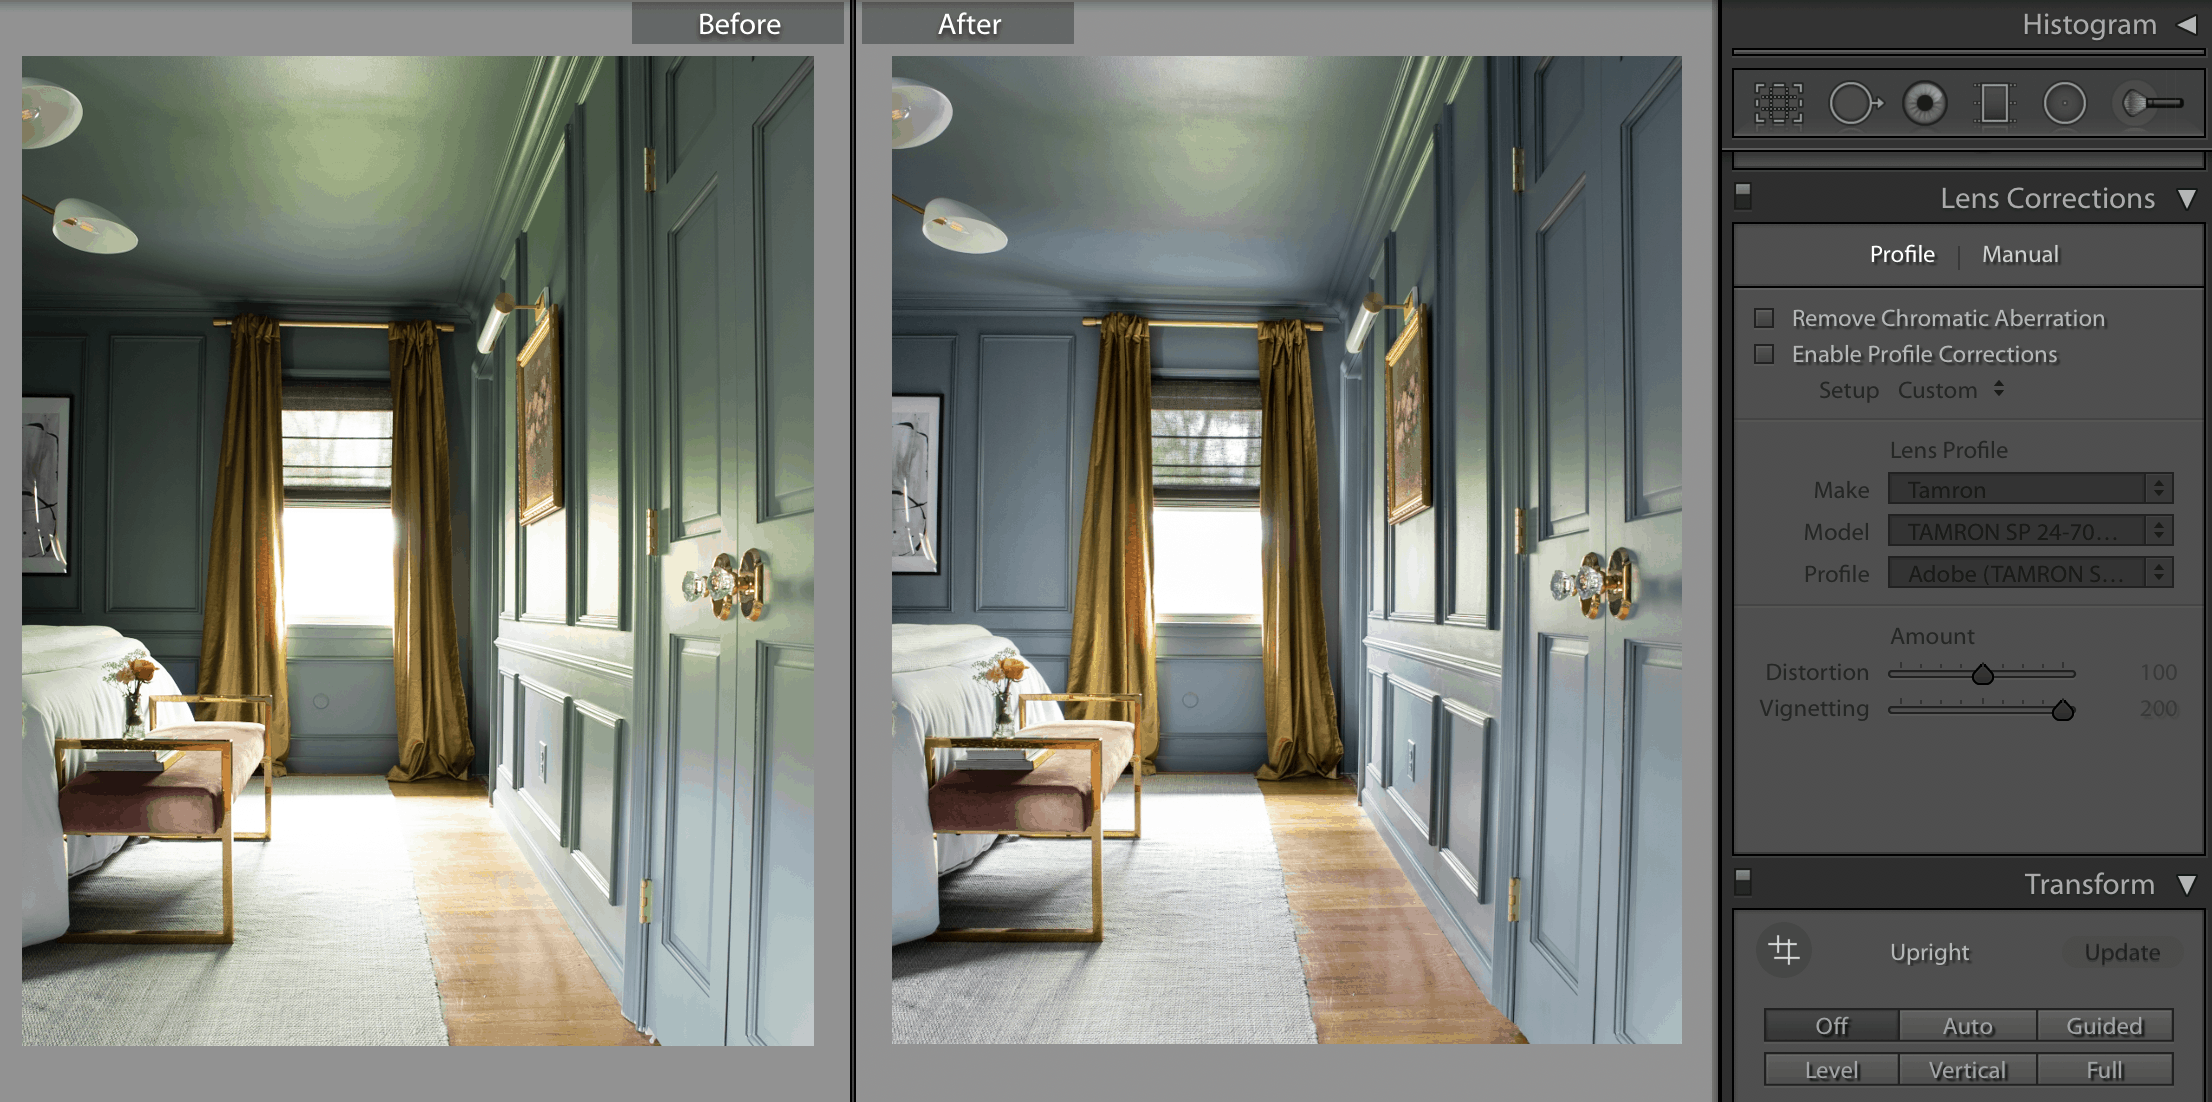
Let’s focus on the After in the above photo. I’ve already edited the brightness, tint, etc. Now I want to fix lens distortion that you see on the right and left side of the photo (it’s more obvious on the closet doors). Notice how it’s sort of curved inward? That’s because I shot at the widest angle (24 mm) to capture more surface area and in doing so, it created the fisheye distortion look.
Under Histogram, I scrolled down to Lens Corrections and worked some magic (without doing barely any work).
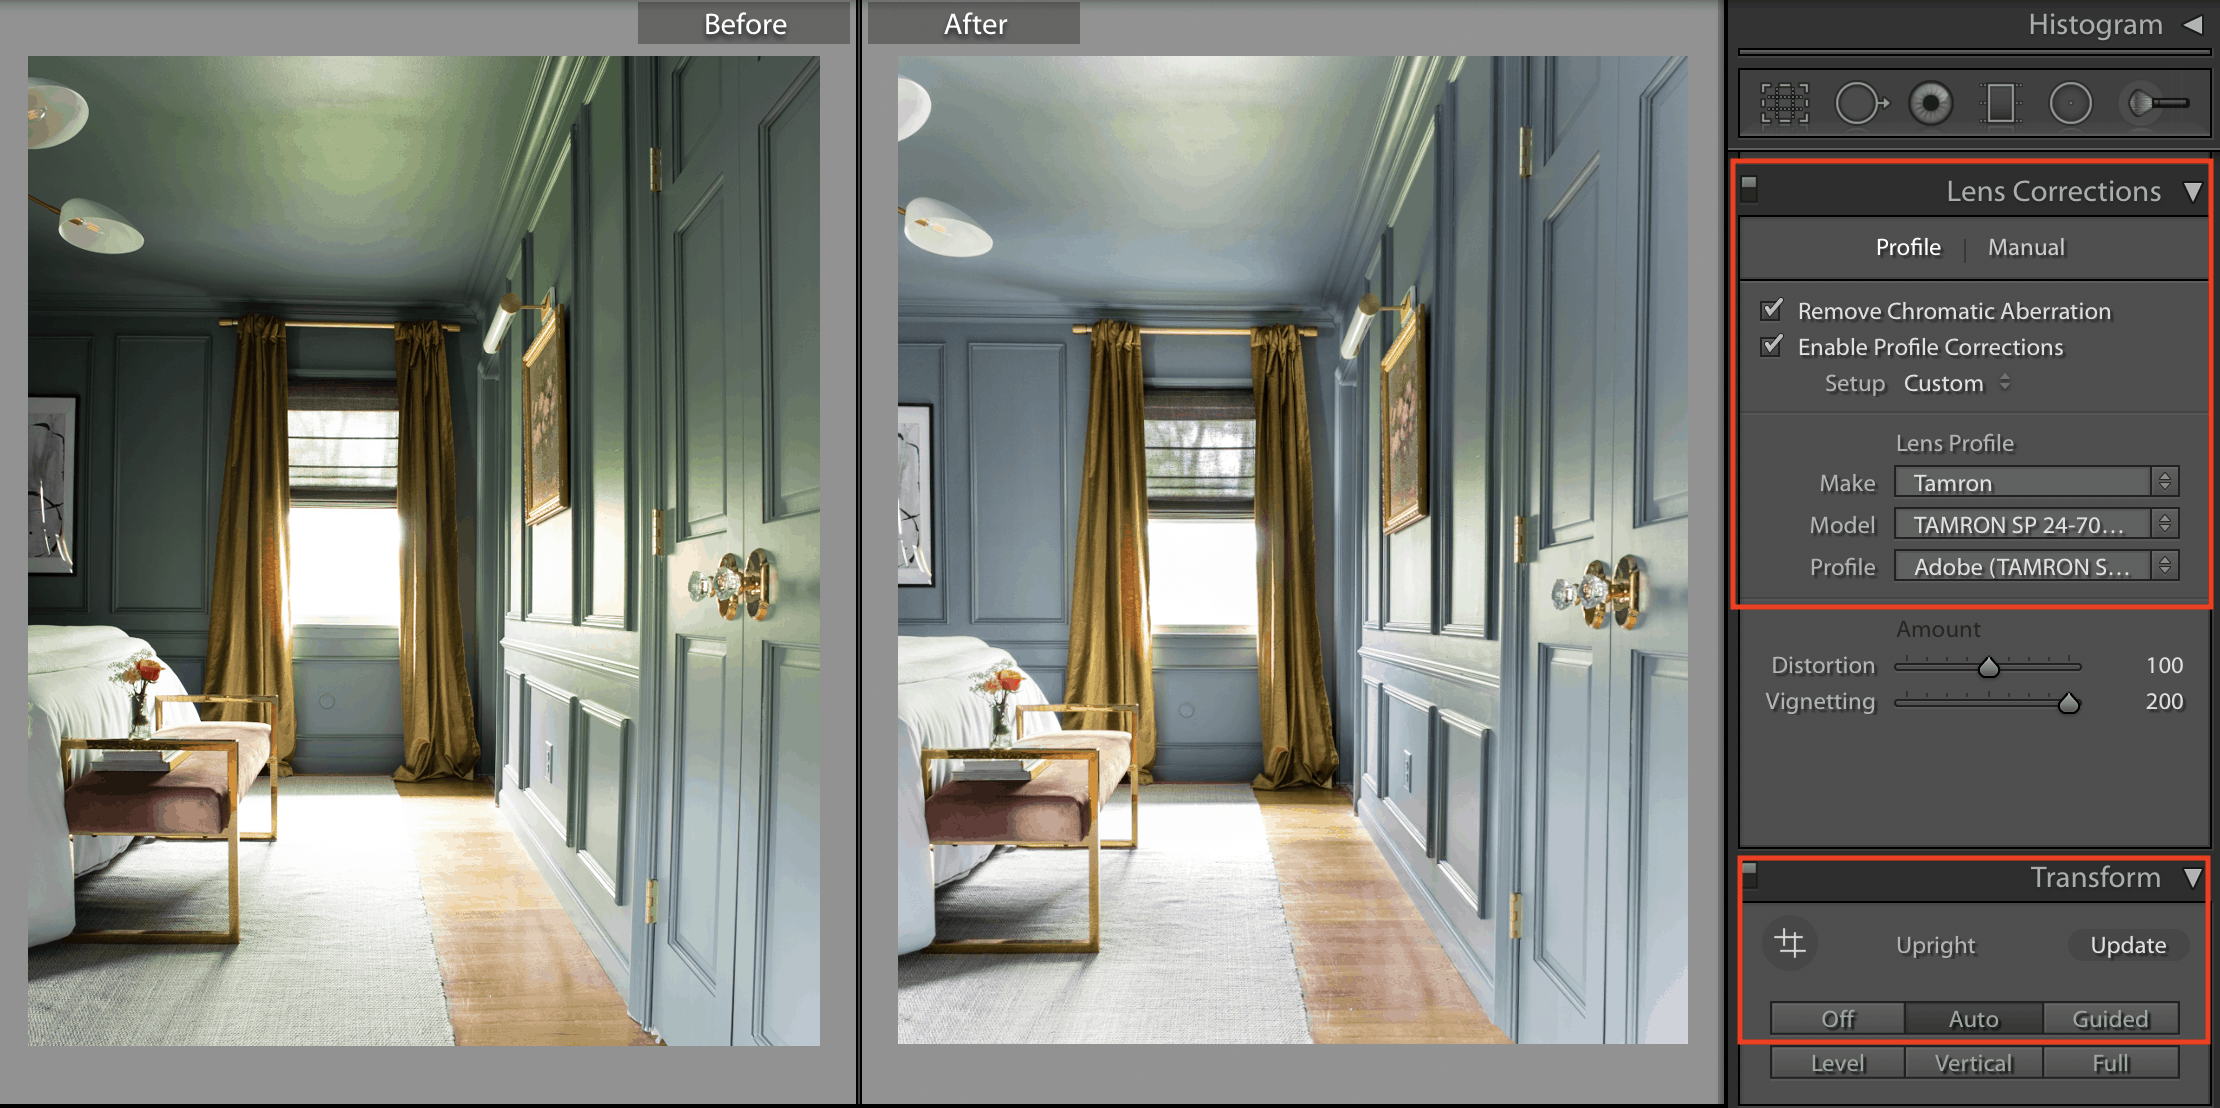
I checked Remove Chromatic Aberration and Enable Profile Corrections (which fixes that fisheye distortion), and then scrolled to Transform and checked Auto (to straighten). See the difference between the original right and above right photos?! Those double closet doors are no longer distorted and the image has an overall cleaner, straighter look.
Note that when you upload photos to your computer, Lightroom will recognize the made/model of your camera (whether you take with an iPhone or camera), which appears under Lens Profile shown above. If Lightroom doesn’t recognize the camera, you can manually select it for the best outcome.
#5 Natural light, always
You may have heard this before, but I think this is the most important tip to take good photos. That means no flash, no supplemental lighting, and no lights on.
Period.
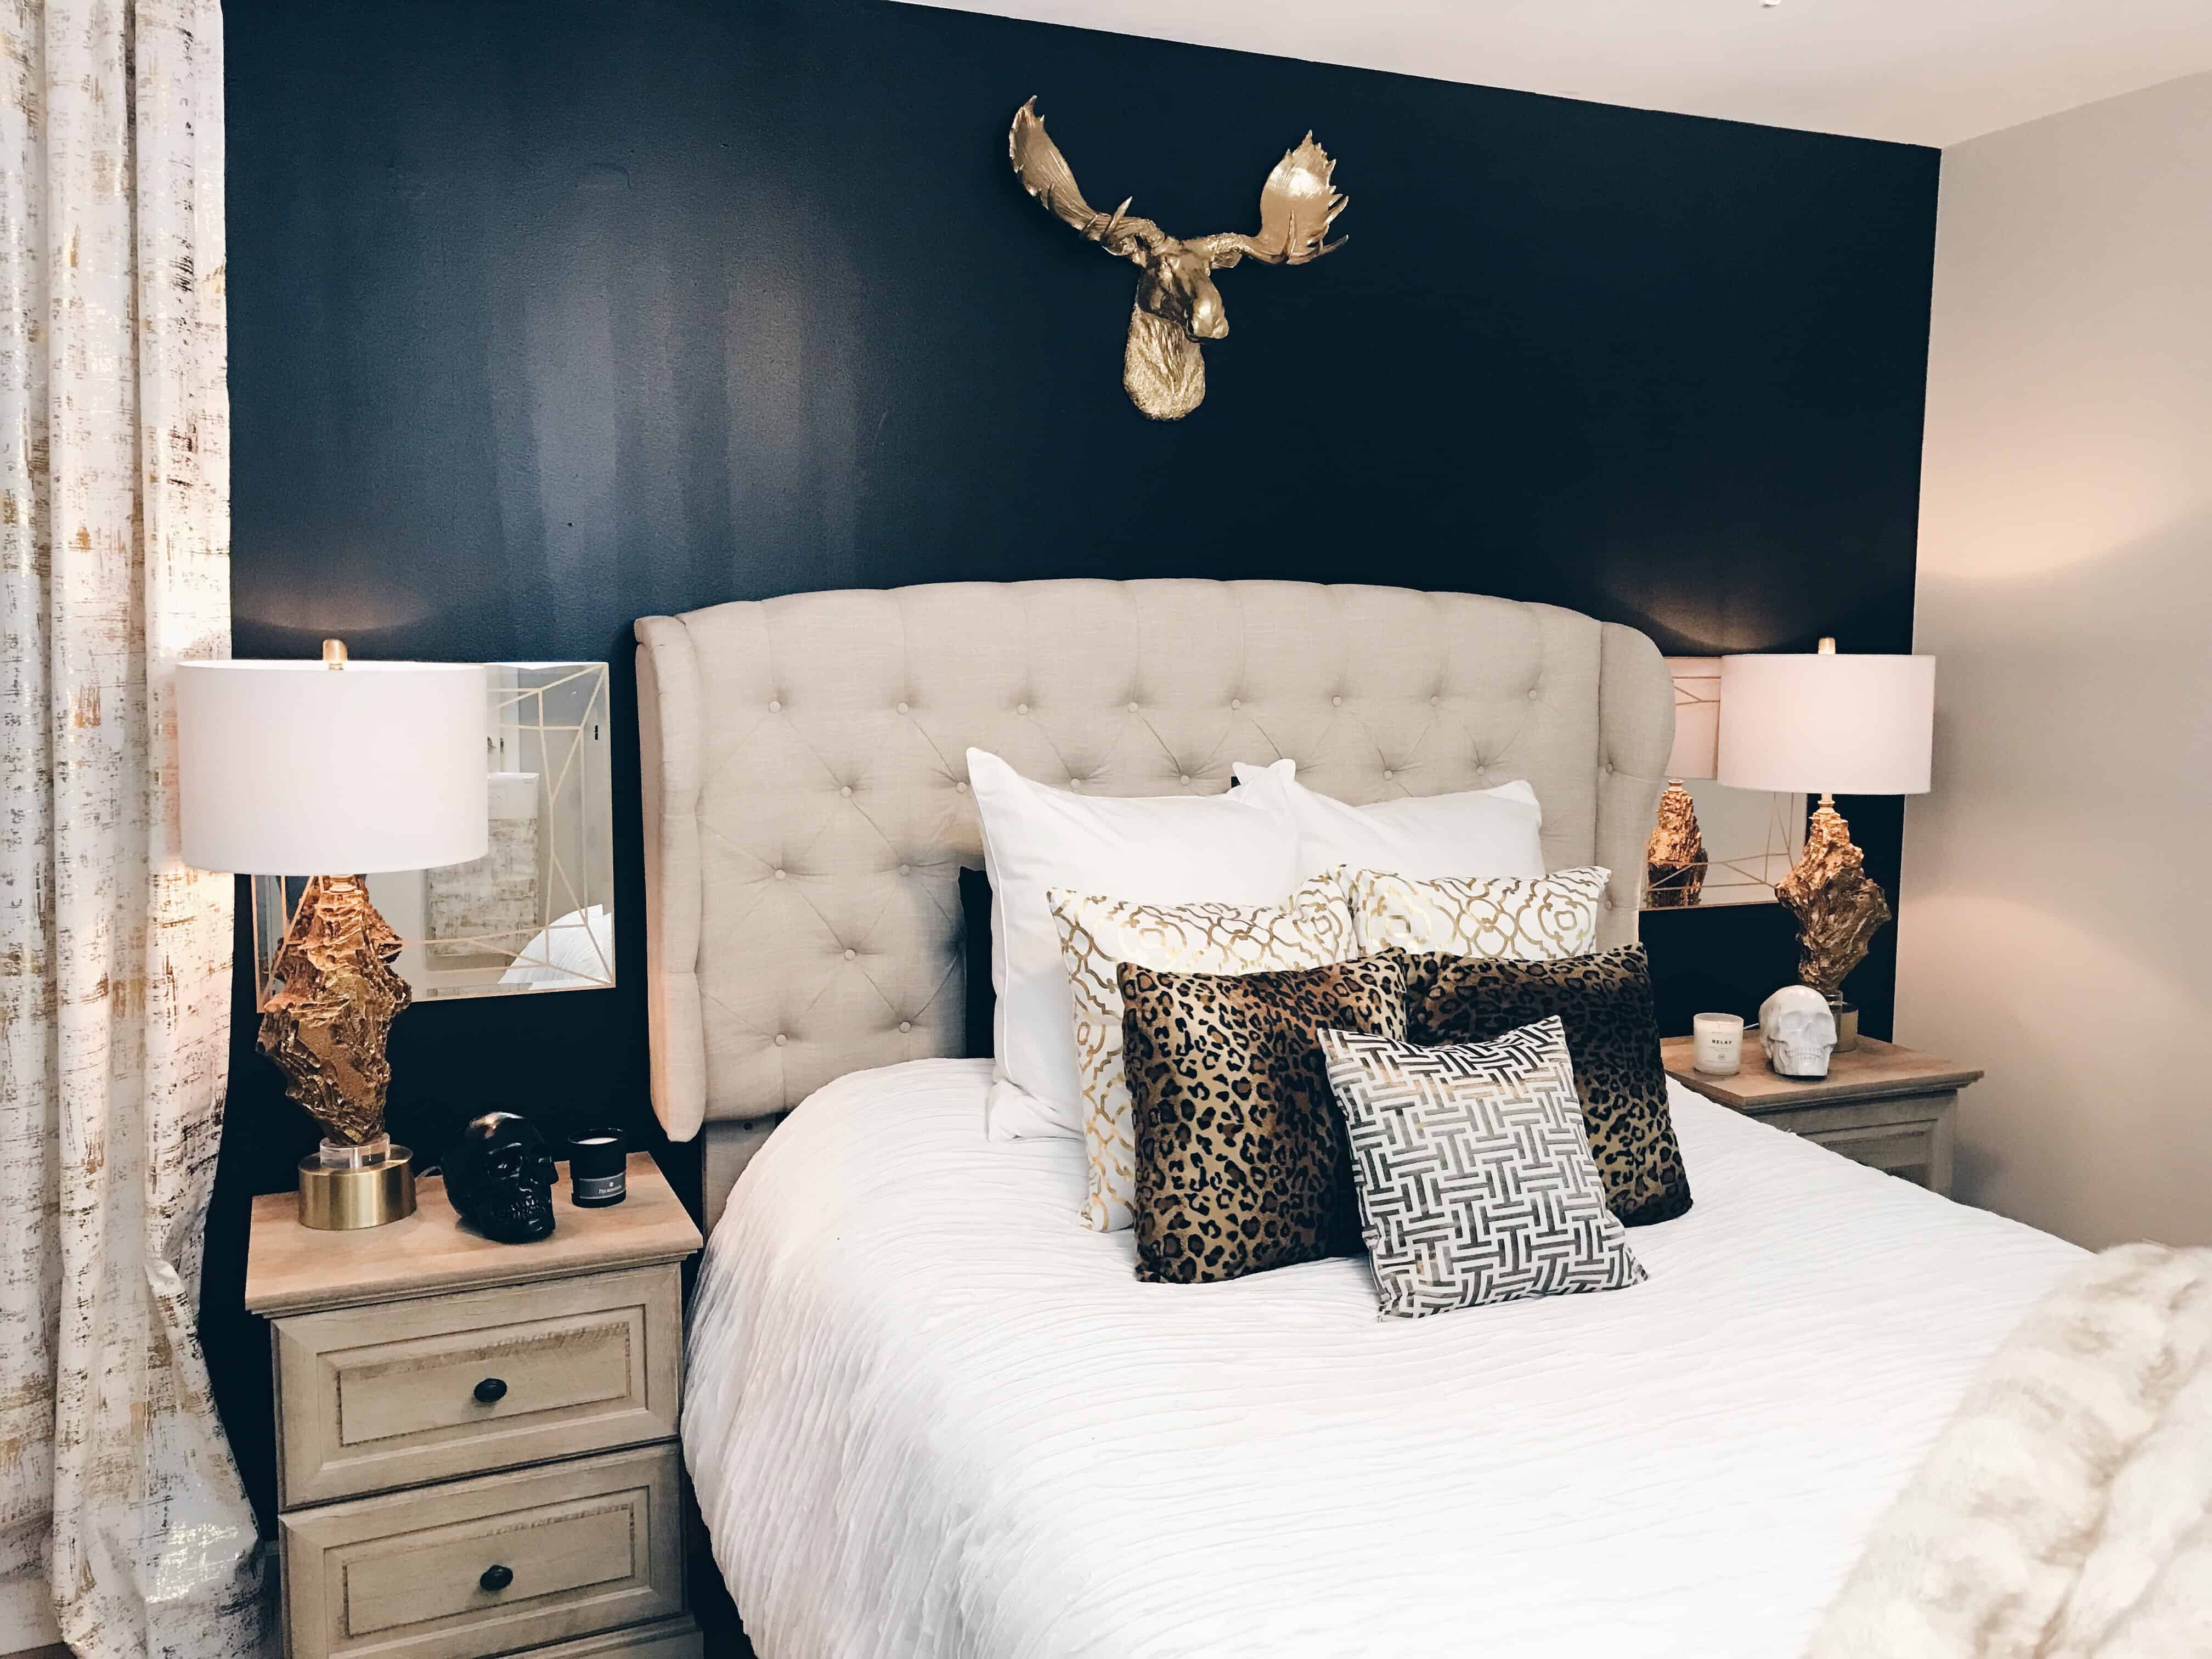
Our bedroom, shot with my iPhone Feb 2018 (with the lights on, big no-no):
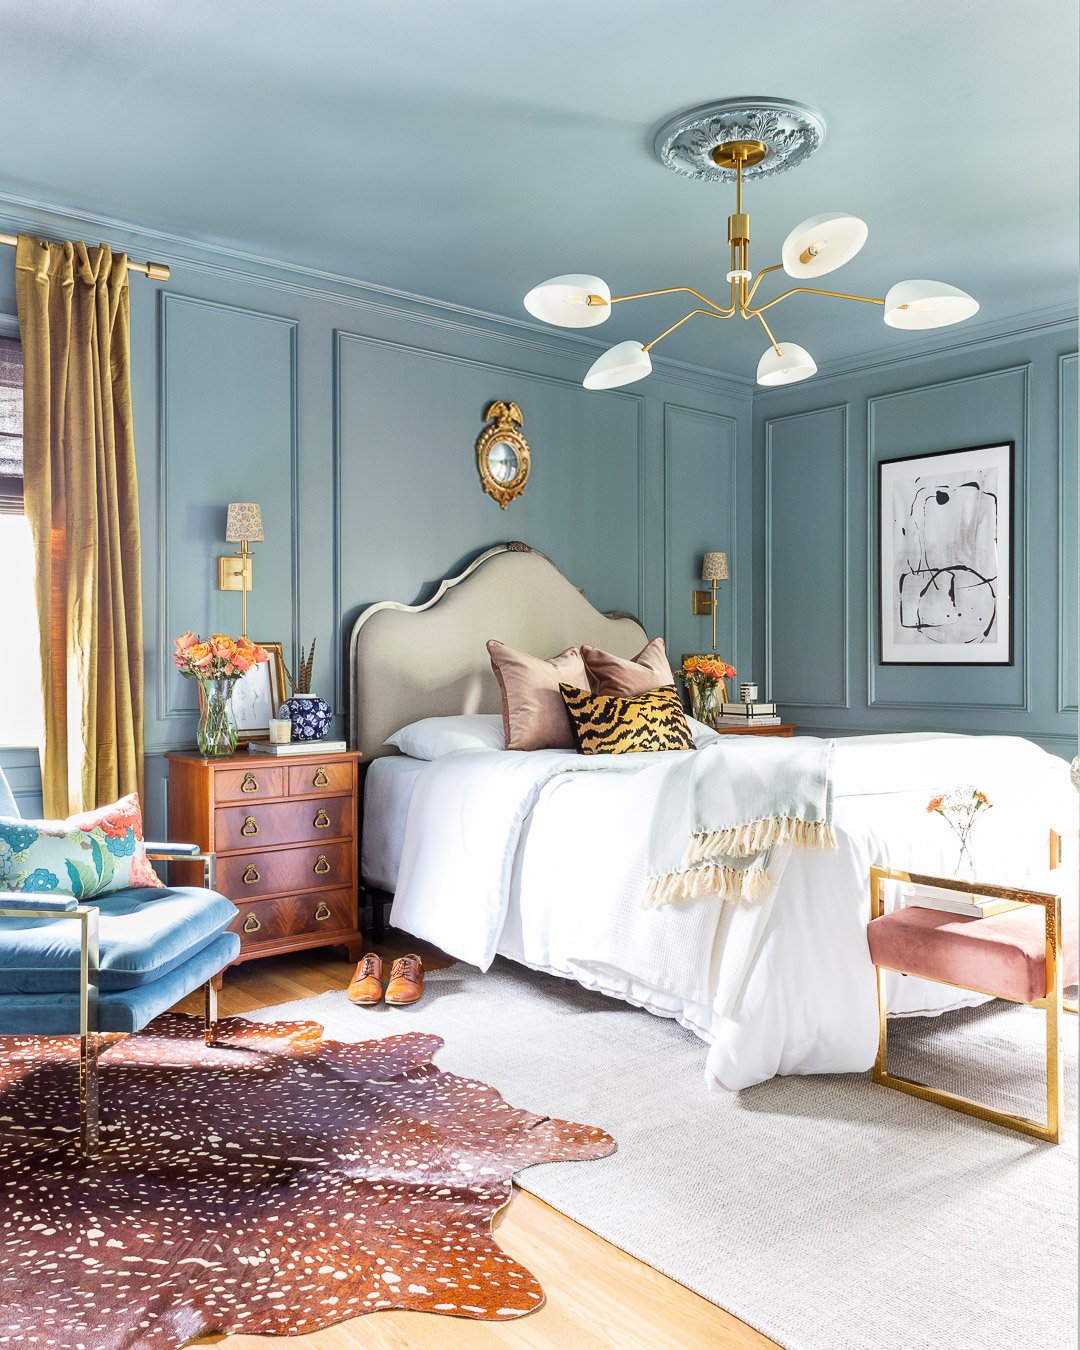
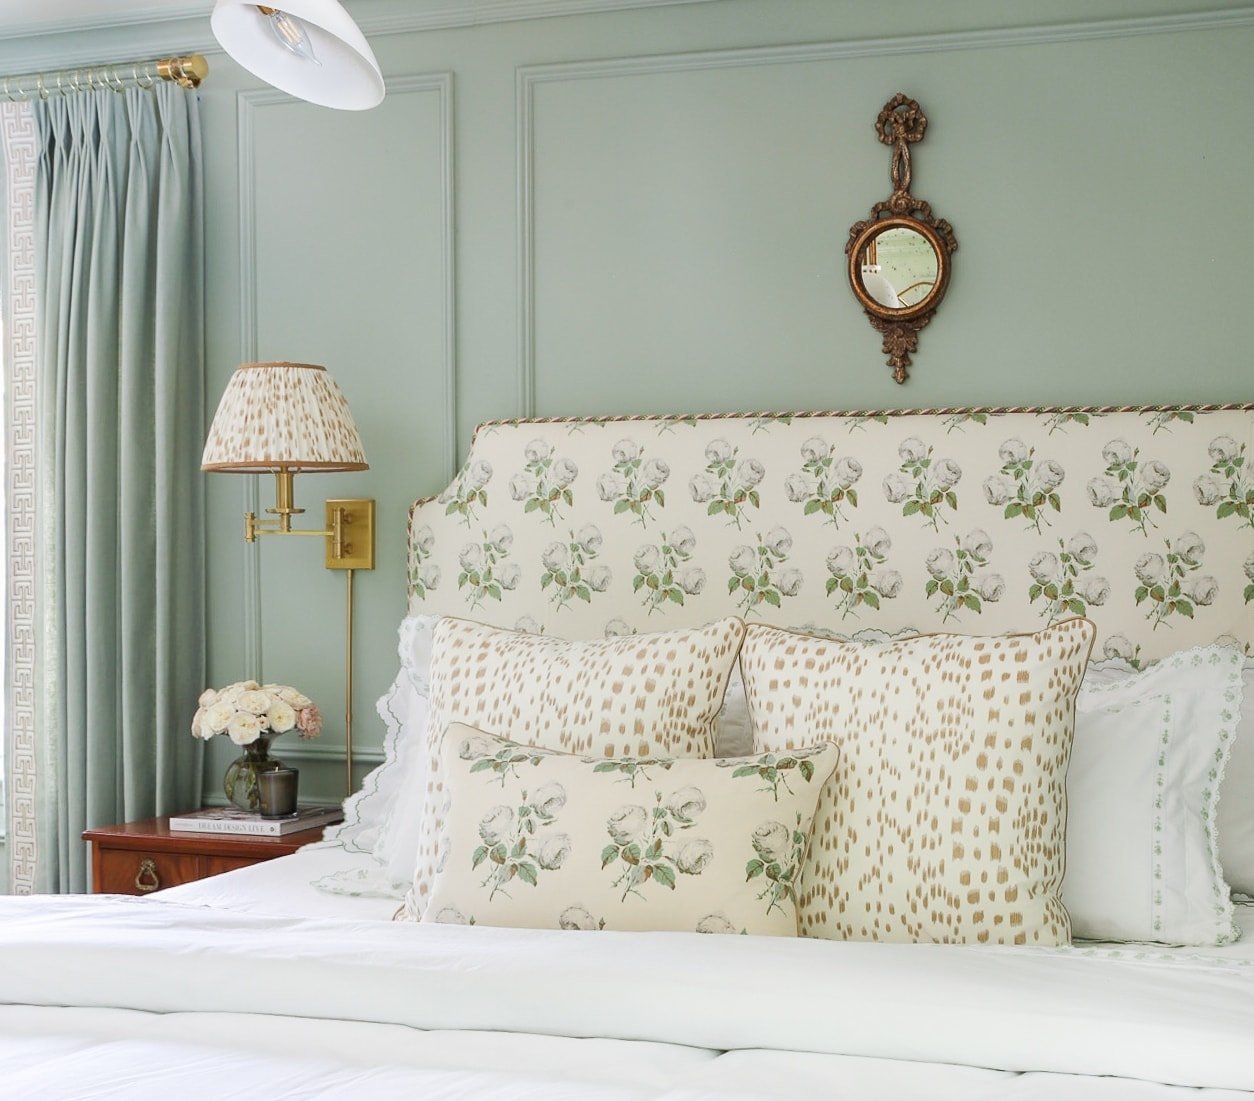
Our bedroom, shot with a Canon 6D and Tamron 24-70 mm f/2.8 lens May 2019:
To avoid weird shadows, try not to shoot on bright sunny days or when the light is pouring directly through the window. I’ve found that my best photos are taken when it’s partly cloudy or when there’s an overcast.
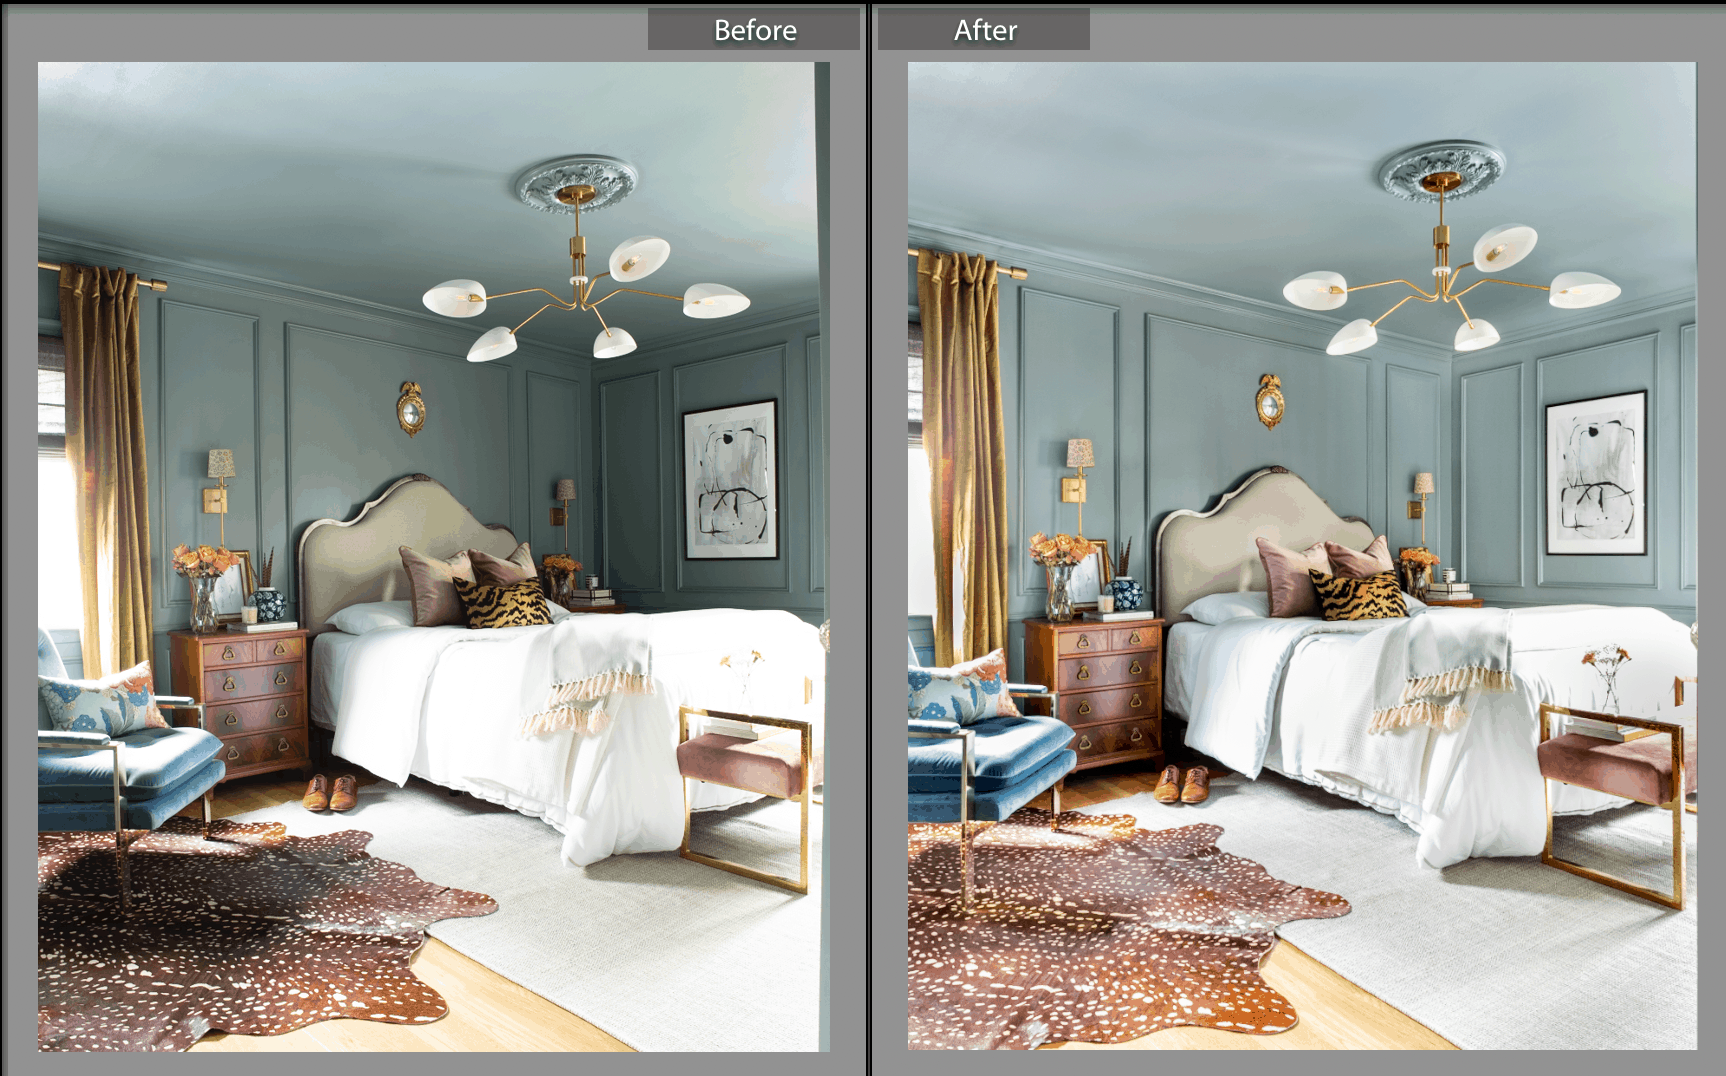
I shot the bedroom on a dark and gloomy day. Do you see the green overcast in the left photo from all the trees outside? Thank god for Lightroom and help from my friend/mentor Jessie Preza (the bedroom photos would not have turned out as good as they did without her help – thanks Jessie)!!
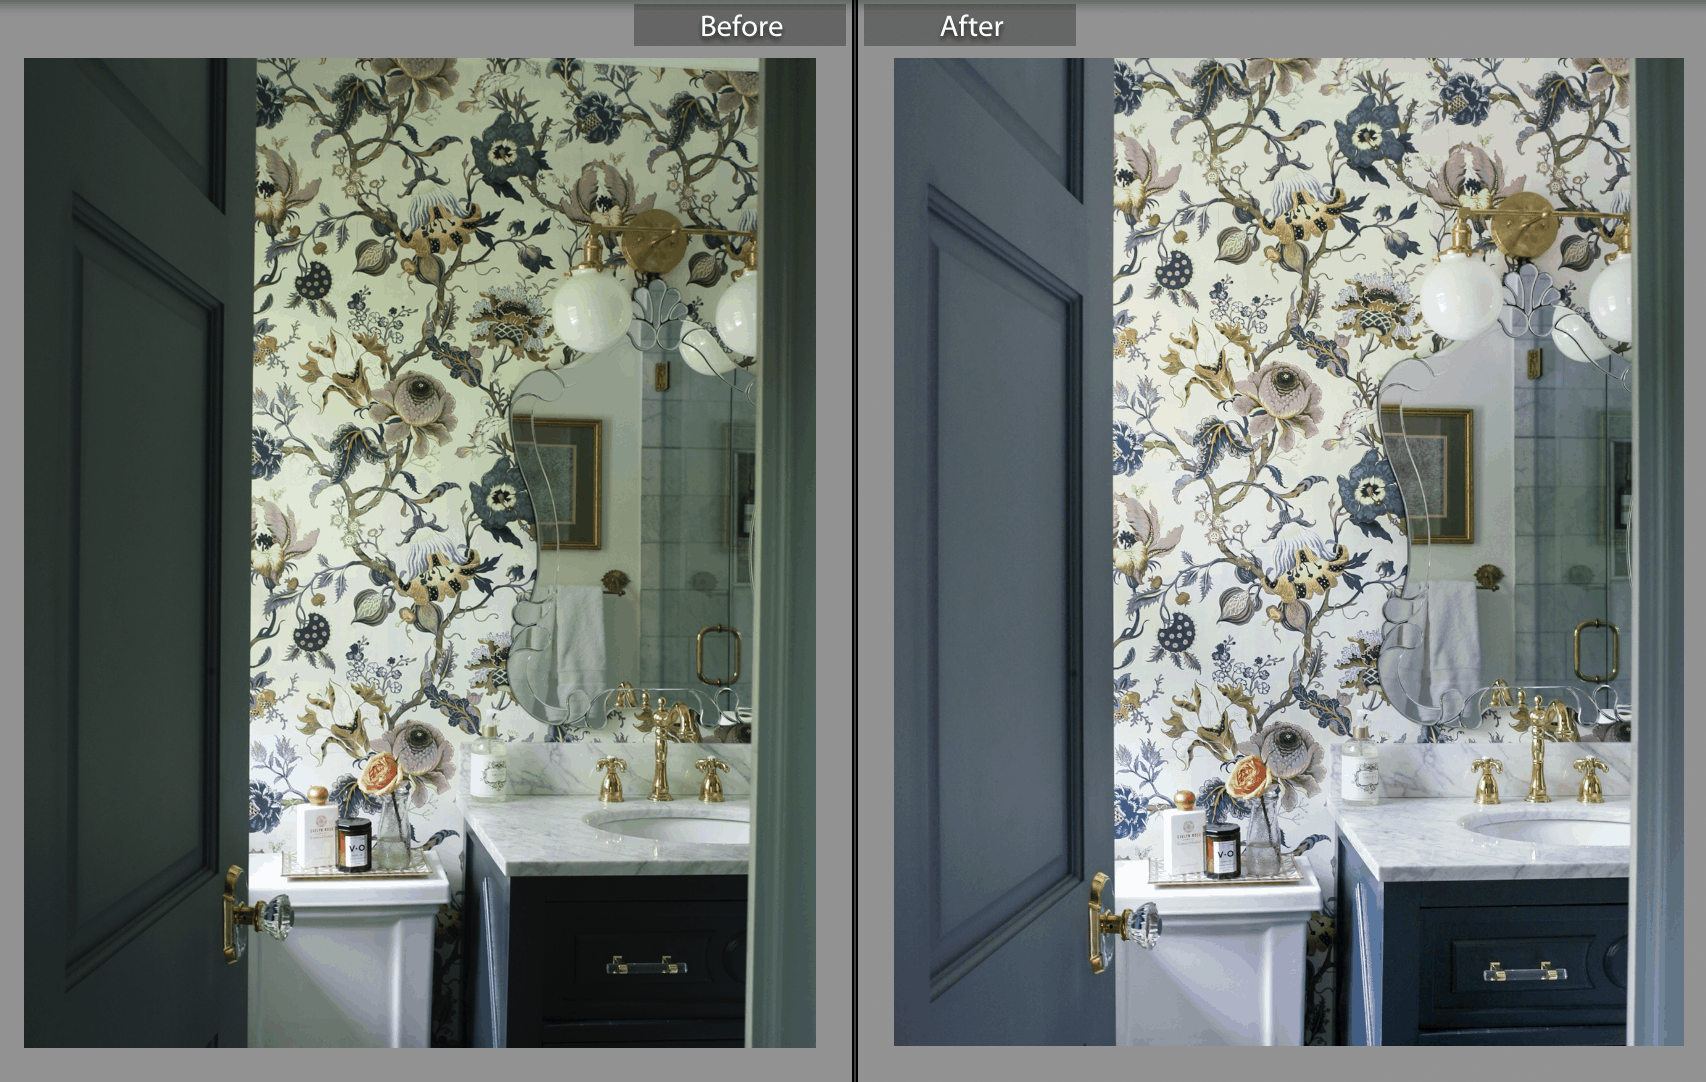
I taped thin white poster board to the window in the bathroom to filter all the green from the trees pouring in, but even then, there was still a green tint.
You can adjust your window treatments to allow more or less light to come in, take a photo to see how it turns out, and then adjust again.
I mentioned above that one of the main reasons I upgraded to a full frame camera is to allow more light into the photos since our house is very dark. If you’re serious about interior photography, I highly recommend a full frame camera since they’re best for capturing photos in low light.
One more thing about lighting – if you’re shooting with an iPhone, don’t forget tip #2 about adjusting exposure!
If you want to see exactly how I edit my photos in Lightroom and can get past the sound of my obnoxious voice and heavy breathing, check out my Photo Tips story highlight in my Instagram bio.
Shop my camera equipment:

Do you use an iPhone or camera to take photos? I’ve barely scratched the surface of the topic of photography, so let me know what else you want me to cover in my my next photography tips post (or via IG stories)!
Alisa, this is exactly what I was looking for. Thank you for breaking this down for us beginners. I can’t wait to use these tips!
Can I say that I’m so jealous of your bedroom Lisa ???????????? stunning knock on wood
This the best how to on taking photos I’ve found…PERIOD. I’ve been trying to step my blog photos up and can’t wait to try these tips. Thank you.