If you’re new around here, welcome! I’m Alisa Bovino and I’m an interior design blogger + student, full-time marketer, serial DIYer, and secondhand furniture stalker. Grab a glass of (bo)vino and follow along as my husband and I renovate our main bathroom over the next few weeks for the Spring 2020 One Room Challenge™ . Stay tuned for the final reveal on June 25th!
Previous ORC’s: Fall 2018 | Spring 2019 | Fall 2019
Before getting into the bathroom progress, I thought I could share some important things that we had to consider when choosing our bathroom tile from The Tile Shop. I learned (the hard way) during our master bath renovation that choosing tile isn’t as easy as picking something pretty and calling it a day…although I wish it were that easy. This week I compiled a few key considerations and tips based on what I’ve learned to help you with your next tiling project!
.01 // DECIDE ON THE MATERIAL: CERAMIC, PORCELAIN OR STONE?
Not all material is made equal, and there are definitely some pros and cons to each:
Ceramic
Pros: durable, budget-friendly, easy to install, low maintenance, stain-resistant, lightweight
Cons: Not as moisture-resistant as porcelain
Porcelain:
Pros: durable, easy to install, low- maintenance, stain resistant, moisture resistant
Cons: usually a bit more expensive than ceramic
Marble:
Pros: higher-end look/feel, unique veining and color from piece to piece
Cons: more maintenance than porcelain/ceramic and usually more expensive
.02 // PICK A COLOR PALETTE
I recommend choosing no more than 3 colors for a bathroom, and sticking to those 3 colors when making tile selections. One of the reasons I love using marble is because of the variation of colors and pattern from piece to piece. You can pull out colors from the natural variations in the stone and use those colors throughout the rest of the room.
.03 // VARY SCALE AND PATTERN
If you’re using a small scale hex on the floor, you could use a larger rectangular format tile for the shower, and vice versa. I chose a small-format herringbone with a 4×12 tile for the shower and used a similar herringbone/rectangle for our master bath (2 different sizes). It helps to visually break up the floor and the shower area. I considered subway tile for the shower, but it would have looked way too busy with the small herringbone on the floor.
.04 // GROUT CAN MAKE OR BREAK THE TILE
I’ll admit that grout is not something I really stressed about in our master bath, but I wishhhh I did. Grout makes such a HUGE difference in the way your tile will appear. A few things to consider when choosing tiles and grout:
– how far apart your tiles will be spaced. I like to space tiles super close, between 1/16″ and 1/32″ as small grout lines look cleaner to me
– The color of the grout. Do you want your grout lines to contrast or blend with the tile? I personally like the grout lines to be almost the same color as the tile.
– Make sure you buy the right type of grout. Unsanded grout is for marble tile and small grout lines, and sanded grout is for wider joints.
.05 // CHOOSE THE RIGHT MORTAR
This is specifically for porous tile, like stone. If you’re using white stone, use white mortar. If you’re using gray stone, use gray mortar. And don’t freak out if your freshly laid tiles turn a different color – they’re just absorbing the water from the mortar and will go back to their normal color in a few days. I took the below photo a few minutes after we tiled the first few rows to show how much grayer the tiles look once they absorbed all that water! 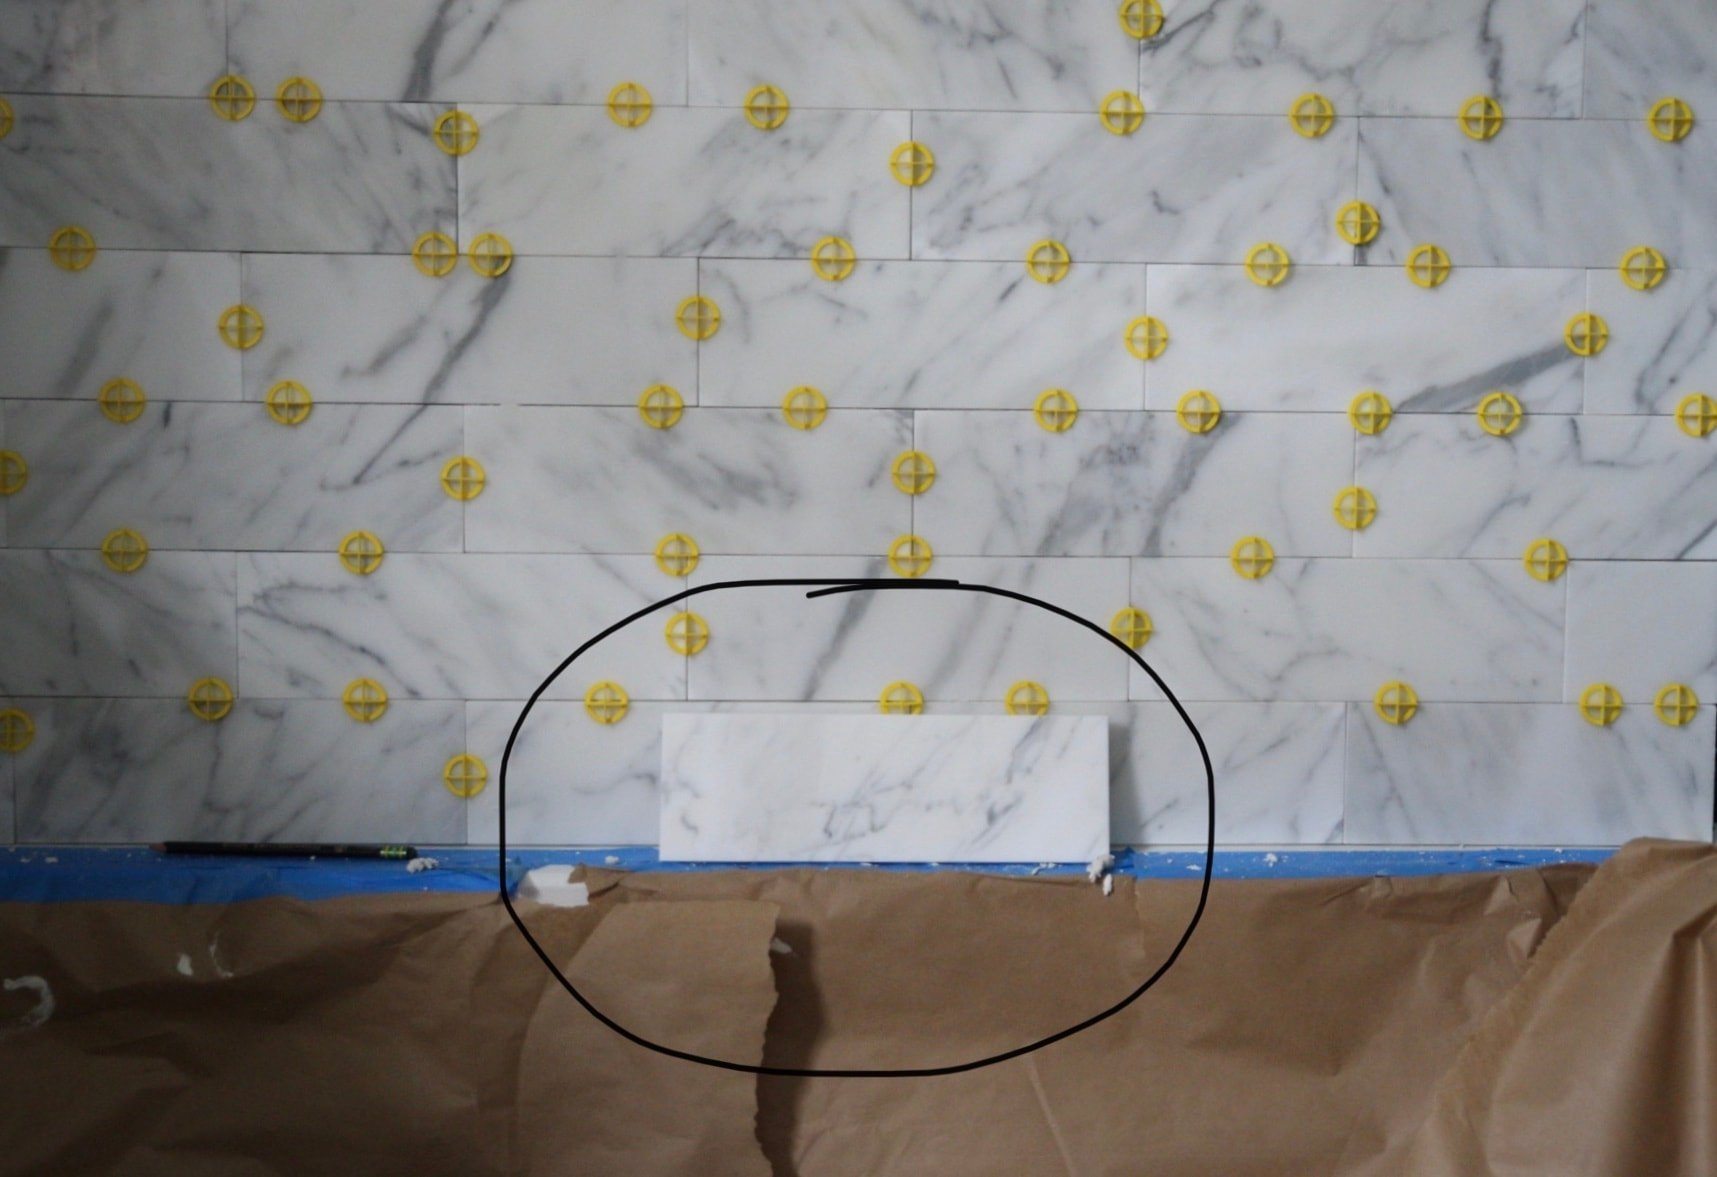
CONSTRUCTION UPDATES:
The largest (and only) update this week is that we started TILING! I waterproofed the shower and immediately spent quite some time picking and choosing each individual tile from different piles so that there was a good amount of color and pattern variation from tile-to-tile and row-to-row.
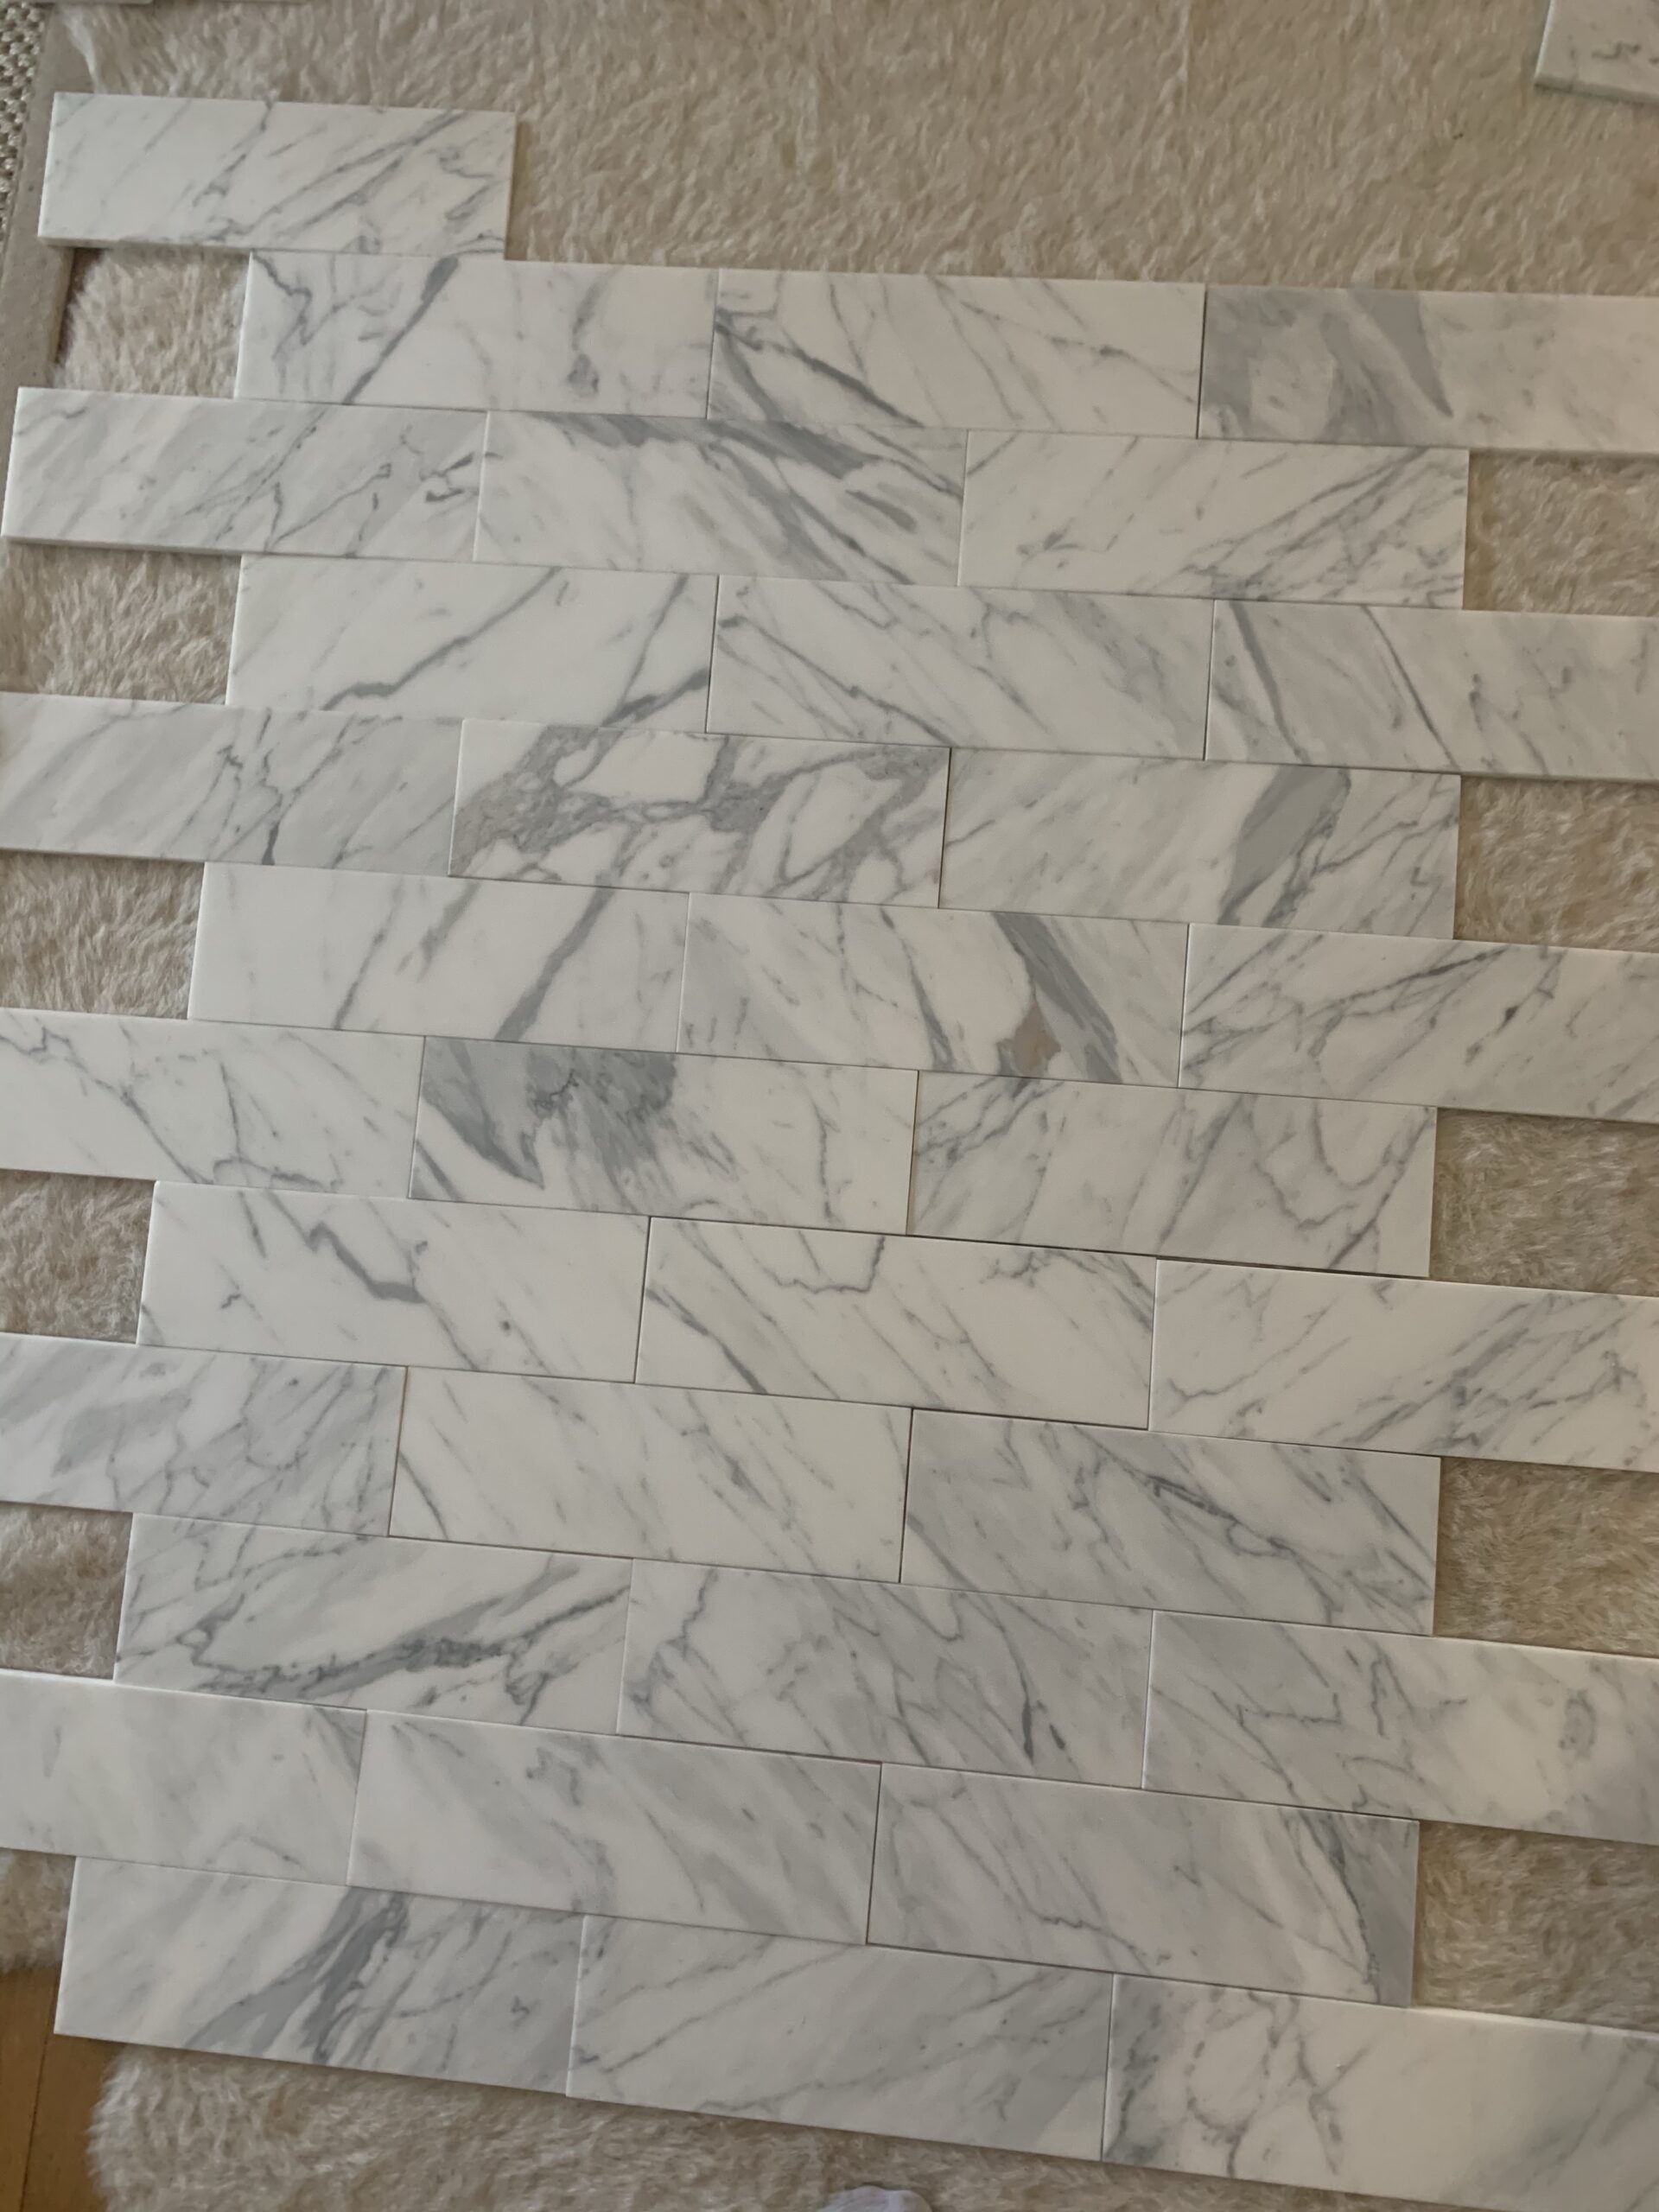 

It sounds a little crazy to lay out the tiles, but the extra upfront work pays off once all the tiles are on the wall and the pattern looks amazing.
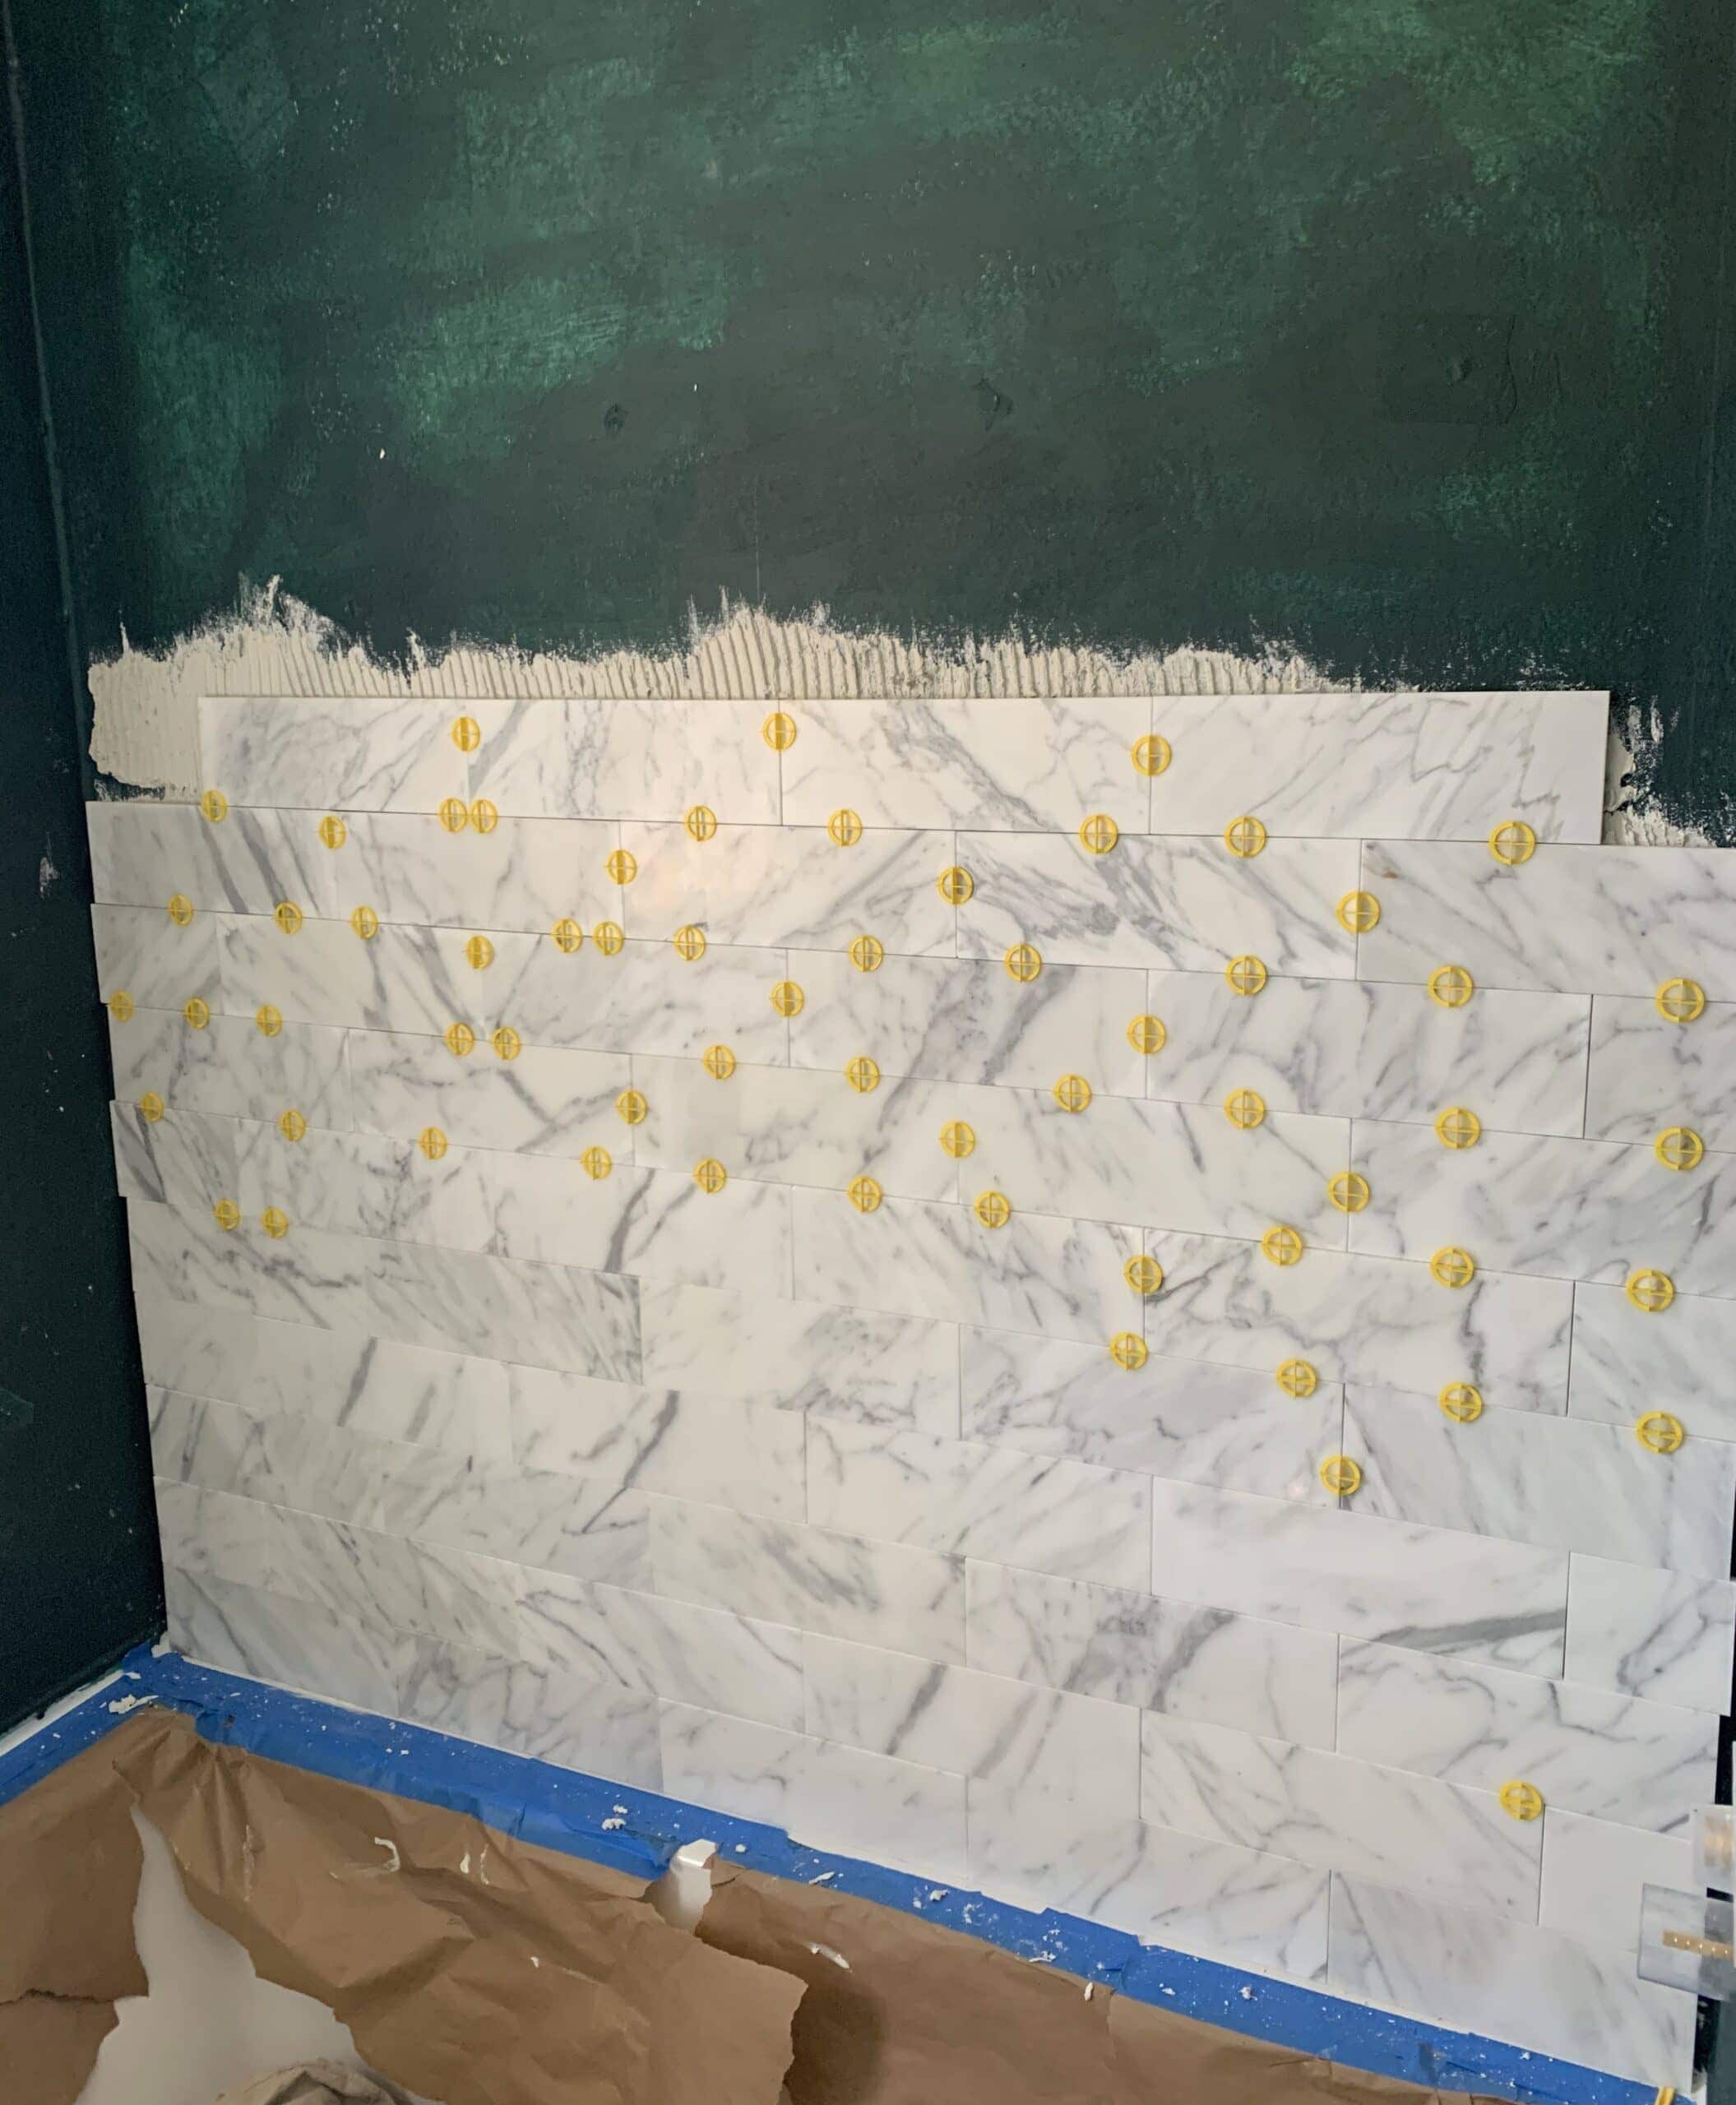
Since the first row took so long to get *perfect,* we barely made it halfway up the wall before calling it a day. But we got a system going and feel confident that the remaining rows and walls won’t take as long as the first few rows did. Only have about…50 or so rows left before the rest of the shower is done? We’re fine. Everything is fine 😀
Here’s the full to-do list, which I’ll be sharing each week to keep track of what we’ve accomplished thus far and how much more we still have to go:
- Take measurements and before photos – DONE
- Gut bathroom – DONE
- Rough in plumbing + electrical – DONE
- Install mold-resistant sheetrock on walls – DONE
- Install bathtub – DONE
- Close seams, spackle, and sand – DONE
- Install hardie board on floor and around tub – DONE
- Frame out shower niche – DONE
- Waterproof shower walls – DONE
- Tile shower – in progress
- Prime walls – DONE
- Build and install tub apron – plan for week 5
- Waterproof tub apron – plan for week 5
- Dry fit + install tile on floor
- Install tile on tub apron
- Build and install recessed linen cabinet
- Install 1×6’s and molding
- Prime molding
- Grout shower walls, floor and tub apron
- Seal all stone
- Fabricate vanity countertop
- Install vanity, vanity top, sink and faucet
- Install toilet
- Install flush mount, sconces and exhaust fan
- Build & install open shelving
- Install door
- Install shower fixtures
- Cut and install vanity mirror
- Paint 2-3 coats on walls, ceiling, doors
- Prime vanity
- Paint 2-3 coats on vanity
- Wallpaper inside linen cabinet
- Install curtain rod and hang shower curtain
- Install roman shade
- Add finishing touches
- Photograph room
- REVEAL: June 24th!
Be sure to follow the other featured designers below and check back next week for more progress photos and design details!
Deeply Southern Home| Design Maze | Dwell by Cheryl | Erika Ward | Home Made by Carmona
House of Hipsters | Hunted Interior | Kandrac & Kole | Kate Pearce | Katrina Blair | Liz Kamarul
Veneer Designs | Rambling Renovators | Renovation Husbands | Studio Plumb | Media BH&G



Fab tiling 101! Learned a few tips including the grout type and color of the mortar! I also like my grout as thin as possible and so true to have the tile mapped out before install, especially with natural stone! Looking forward to see the tub apron next week!
Yes!!! Great minds ???? thanks Tim!!
It’s looking fabulous! Great tile tips too! Such fun to see everyone’s progress!
Thank you so much Deb!!
That bathroom is going to be fabulous and I can’t wait to see the big reveal
Thanks for the tile advice. I like the close spacing, too as I look at the wide spaced ugly tiles in my bathroom! May I ask what size spacers did you use?
Thanks!
Looking amazing! All of the prep work is so worth it and really shows in your spaces which look anything but DIY
This is all great advice and you are so right about grout! It really can make or break a tile. I made Billy put black grout on our kitchen backsplash, despite the tile explicitly saying to use a light grout to not stain the cement tile (so it was a huge pain in the ass to do), but I am SO GLAD we did it! Looks like a totally different tile than it would have with white —— this is looking so amazing Alisa I am so stoked for this reveal!
Omg Alisa, that marble tile is looking FANTASTIC! I’m so glad you wrote about these tips because an ORC friend is going to teach me to tile our kitchen. And my choice of grout is key!!
Can’t wait to see your finished bathroom!! It’s gonna be gorgeous like all your ORC projects.
I also appreciated the list. Cause I have yet to write out ONE master list and my friend suggested I do that.
Cheers to the half way point. Only 4 weeks left!! ????
It’s looking spectacular! Extraordinary tile tips as well! It’s such enjoyable to see everybody’s improvement!